Four Parts To Your Account Setup!
Part 1
Logging On
Getting into the SocketLabs Control Panel
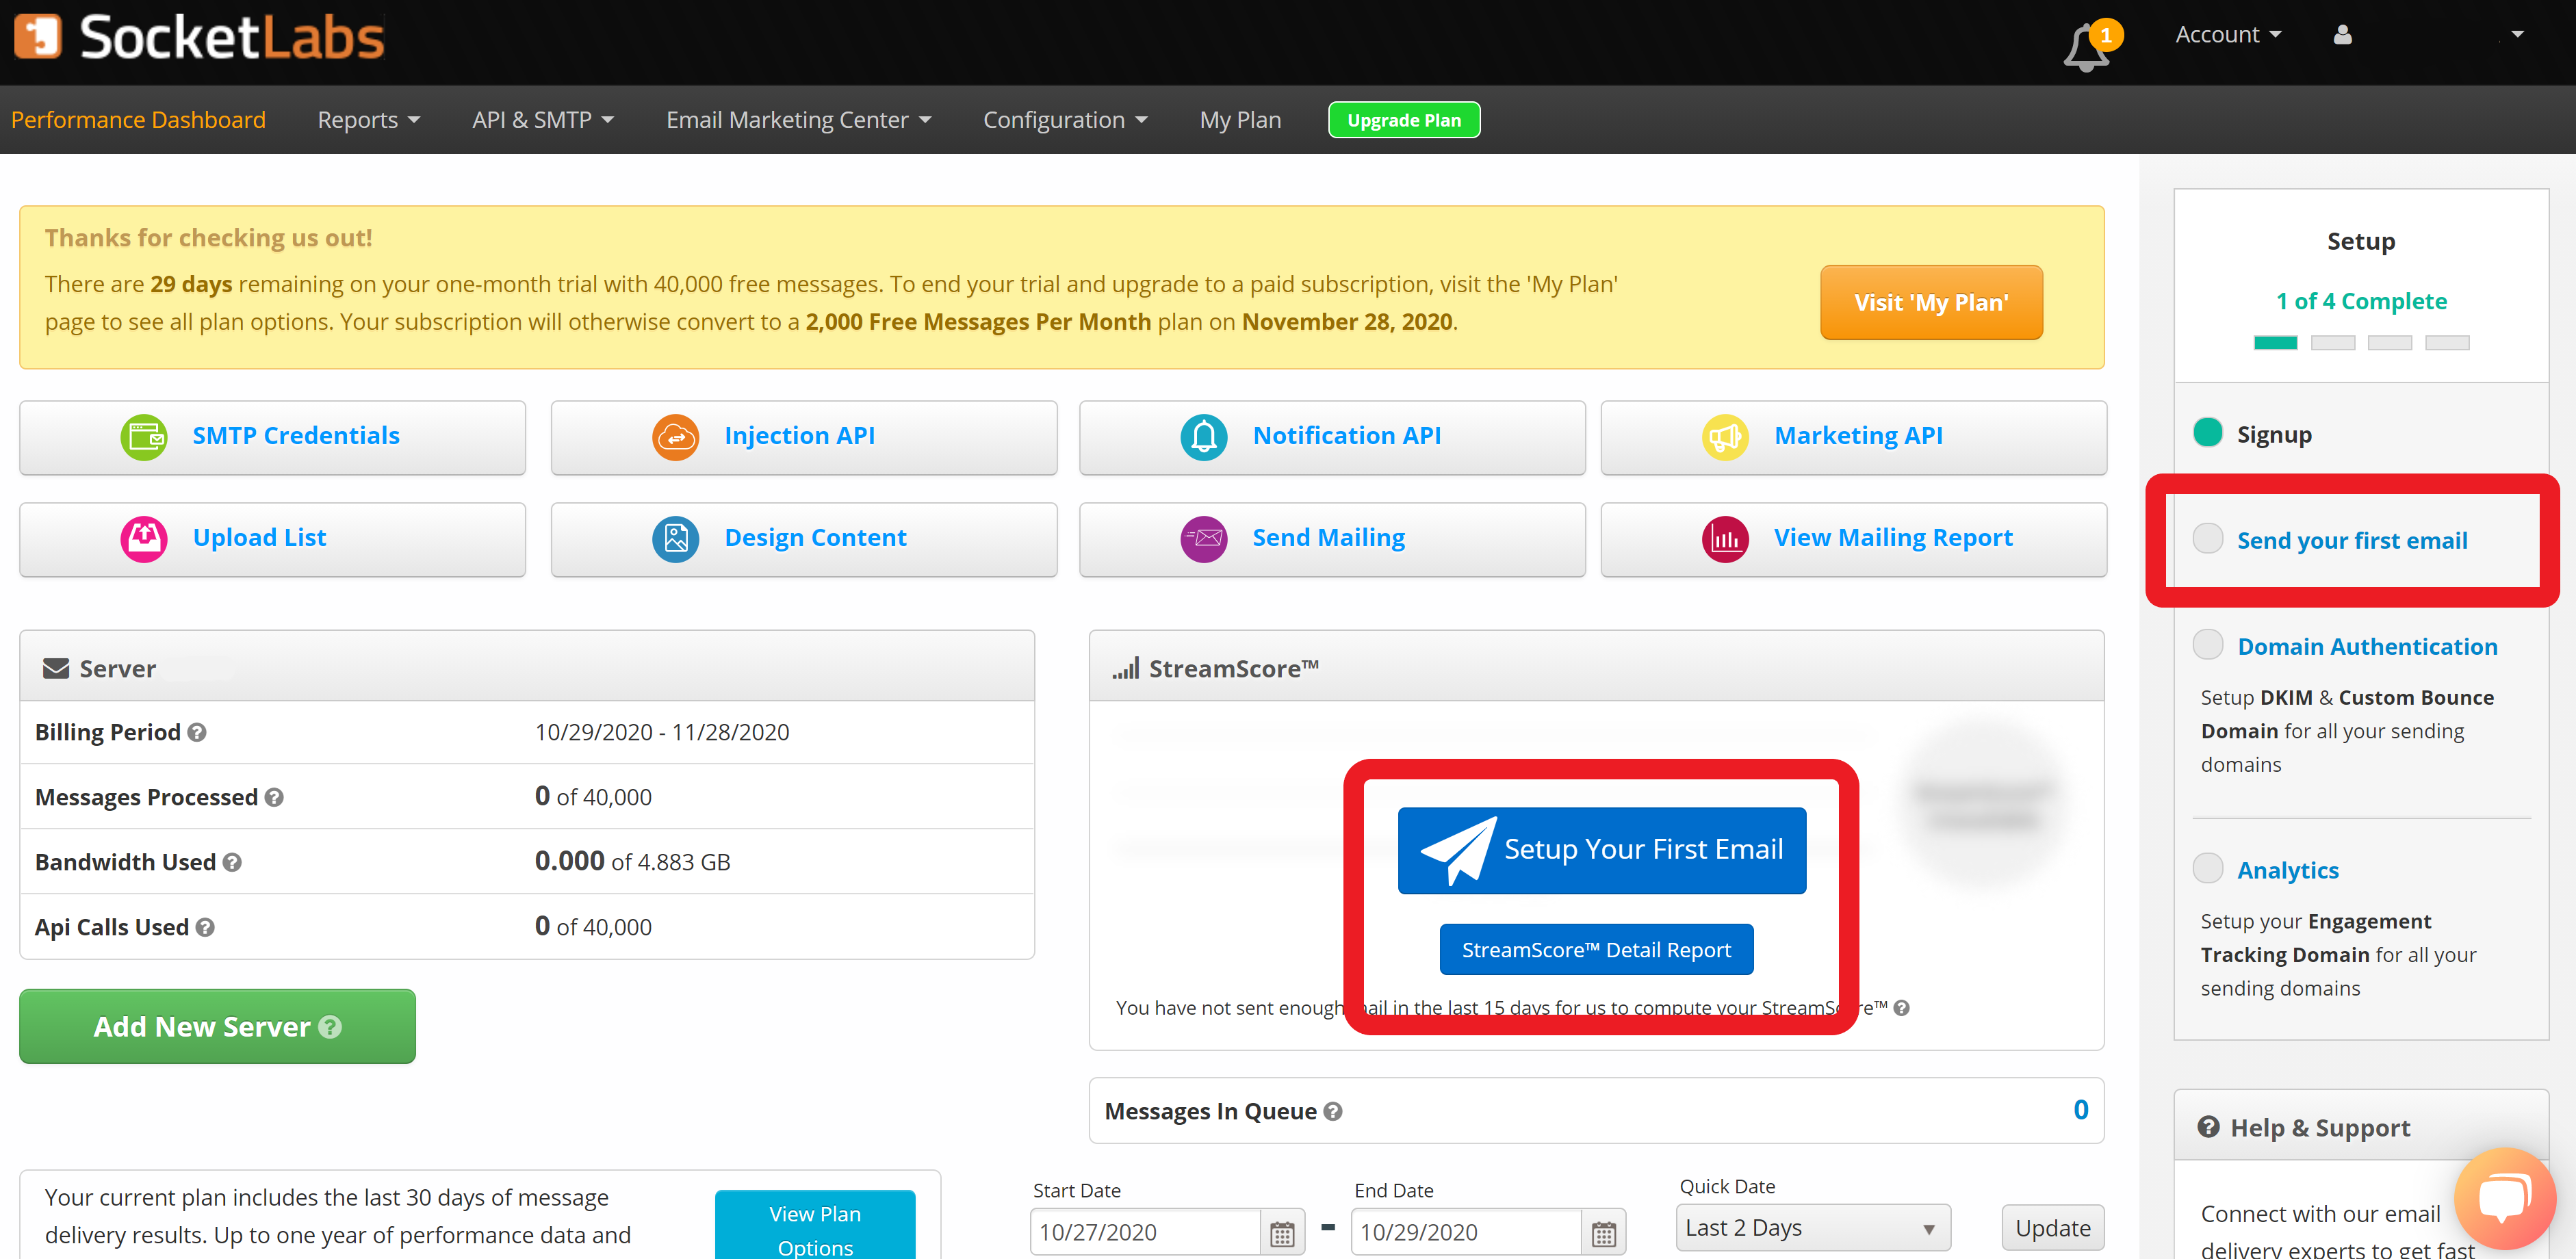
To log in, go to http://cp.socketlabs.com which will take you to your SocketLabs Control Panel.
From here, you can configure your service, access reports and analytics, compose email messages, manage user settings and accessibility, and much more. In the StreamScore™ section and in the Setup progress box on the right side of the page you will see links that allow you to begin or resume your account set up (as shown in the image).
Part 2
Sending Your First Email
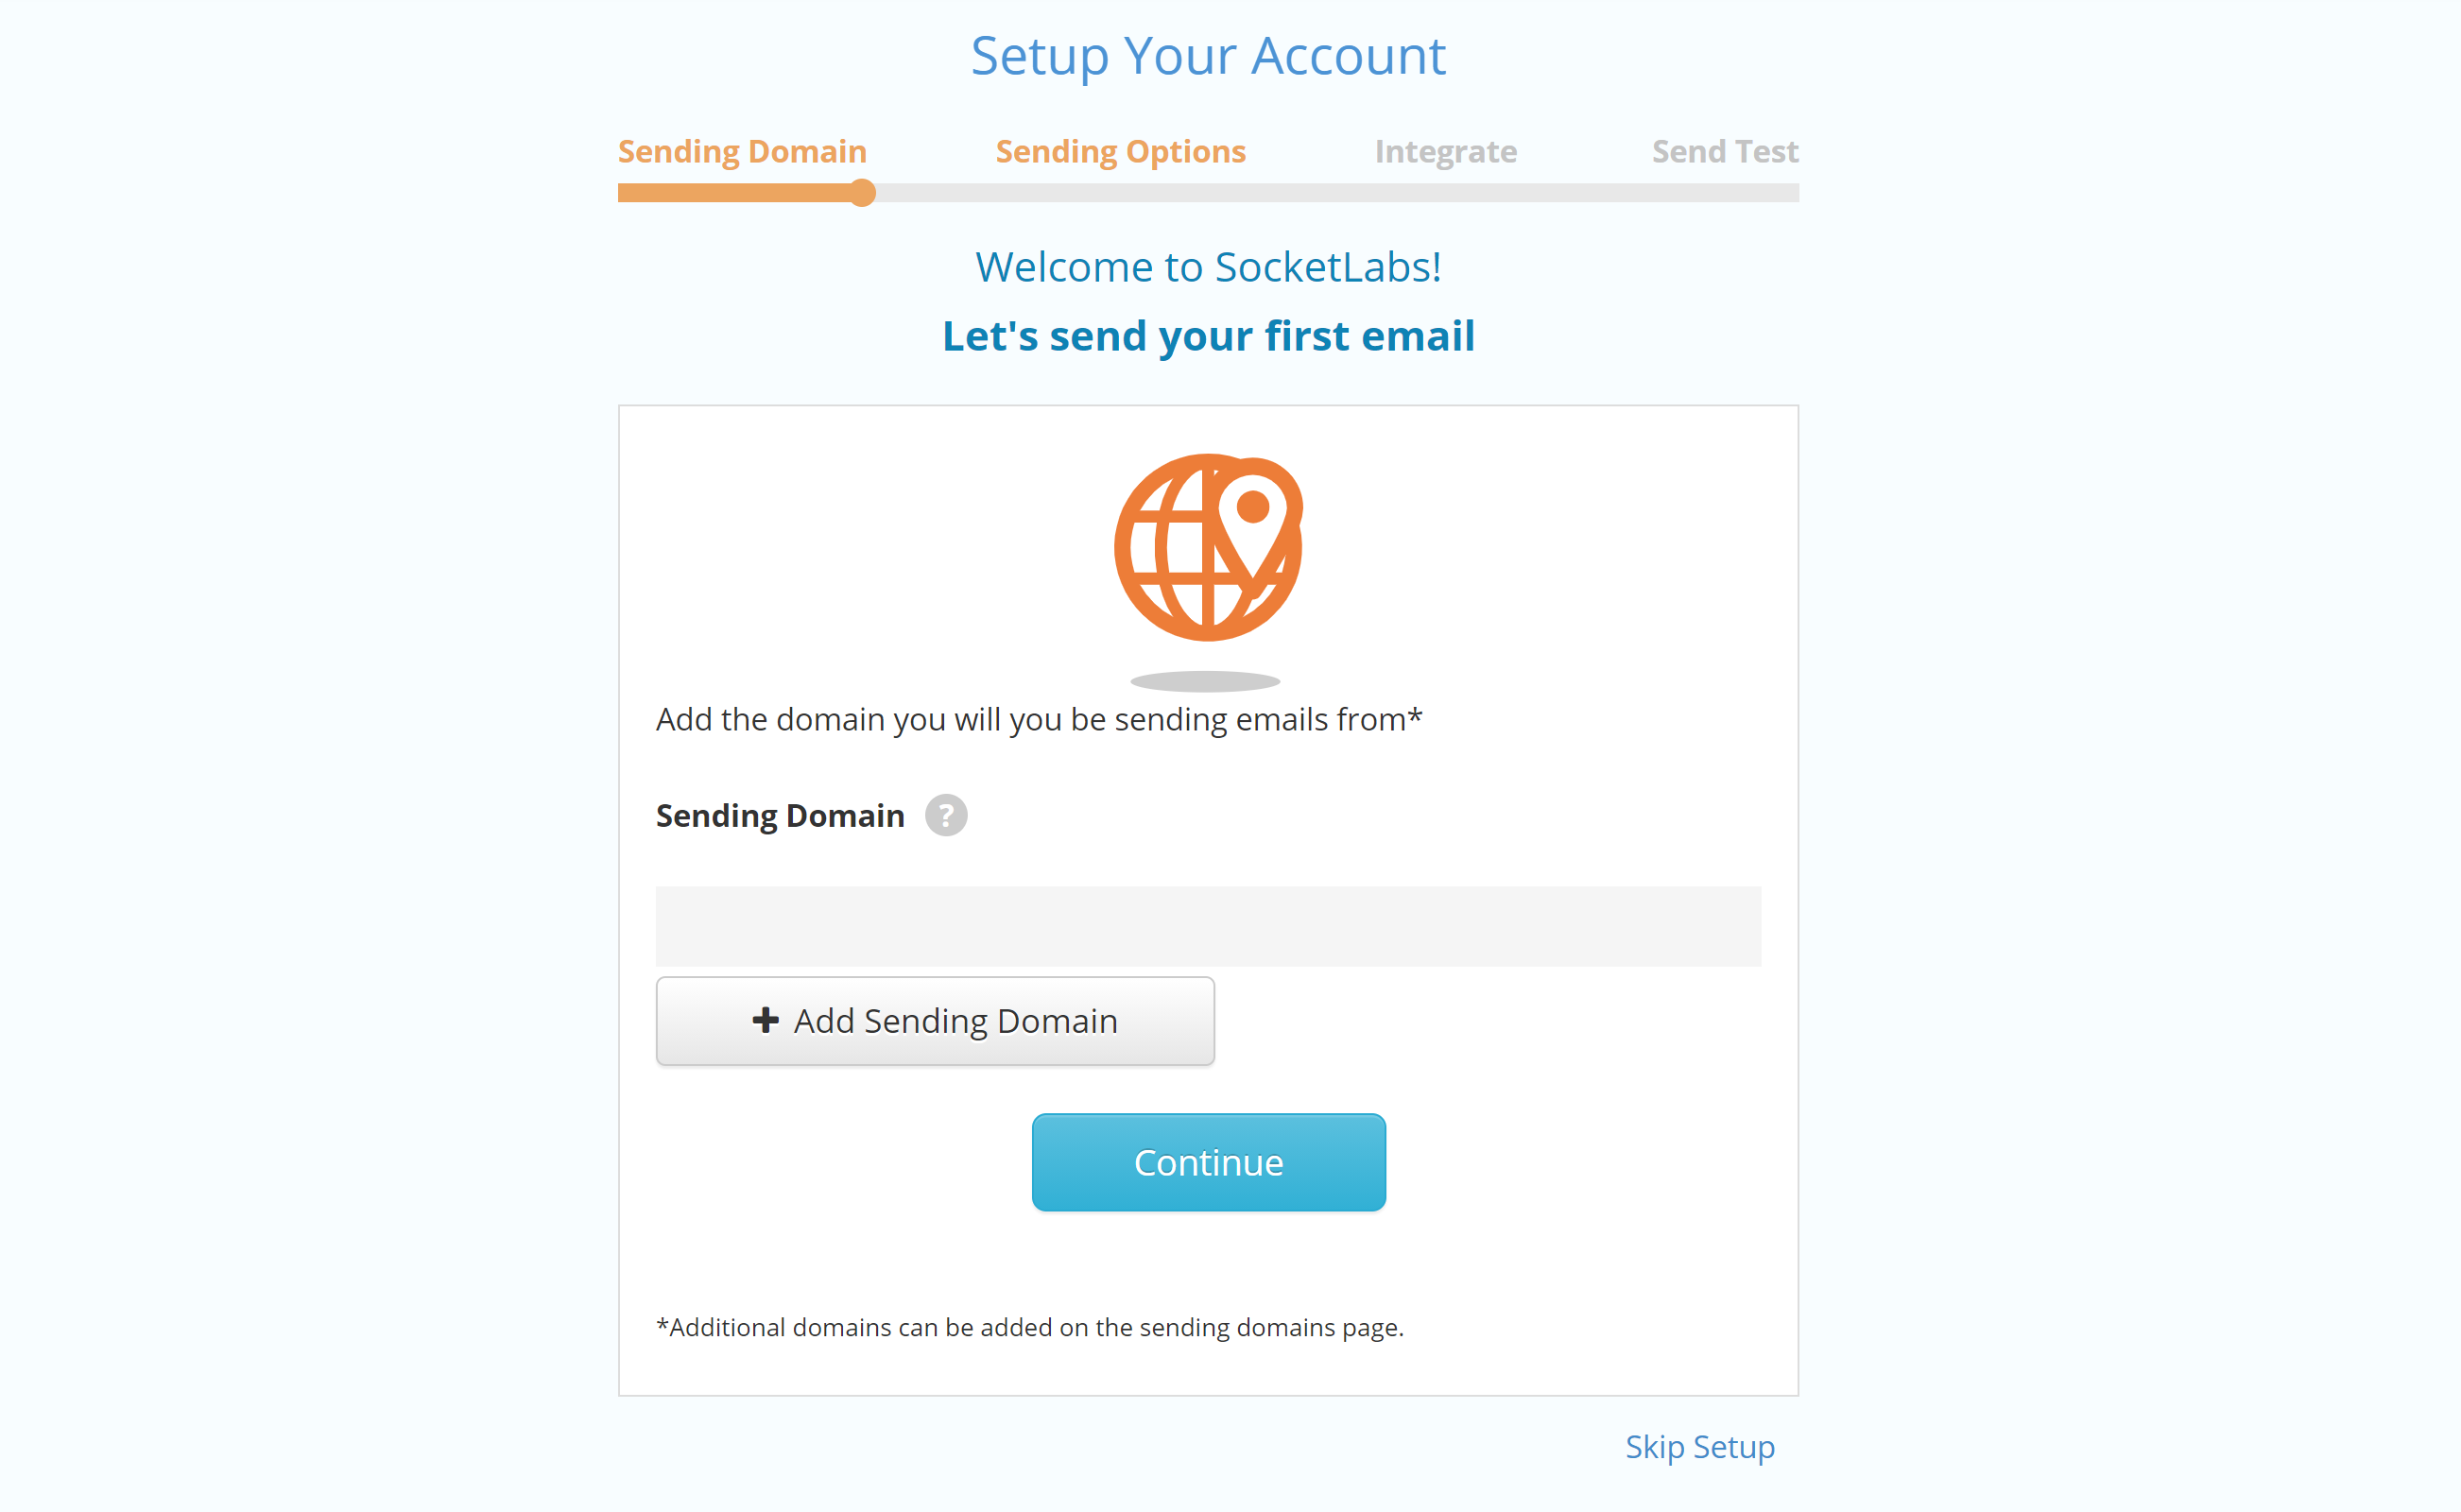
Step 1: Selecting a Sending Domain
After logging in, to send your first email you will need to identify and choose the domain you will be using to send email.
The domain you signed up with and validated will auto-populate in this area for you. If you would like to add additional domains, you will have the option to do so on this page as well. Simply use the “Add Sending Domain” button and enter your additional domain. Once this step is completed, you will follow the ‘Continue’ button to choose your sending method with marketing, API, or SMTP as described further below.
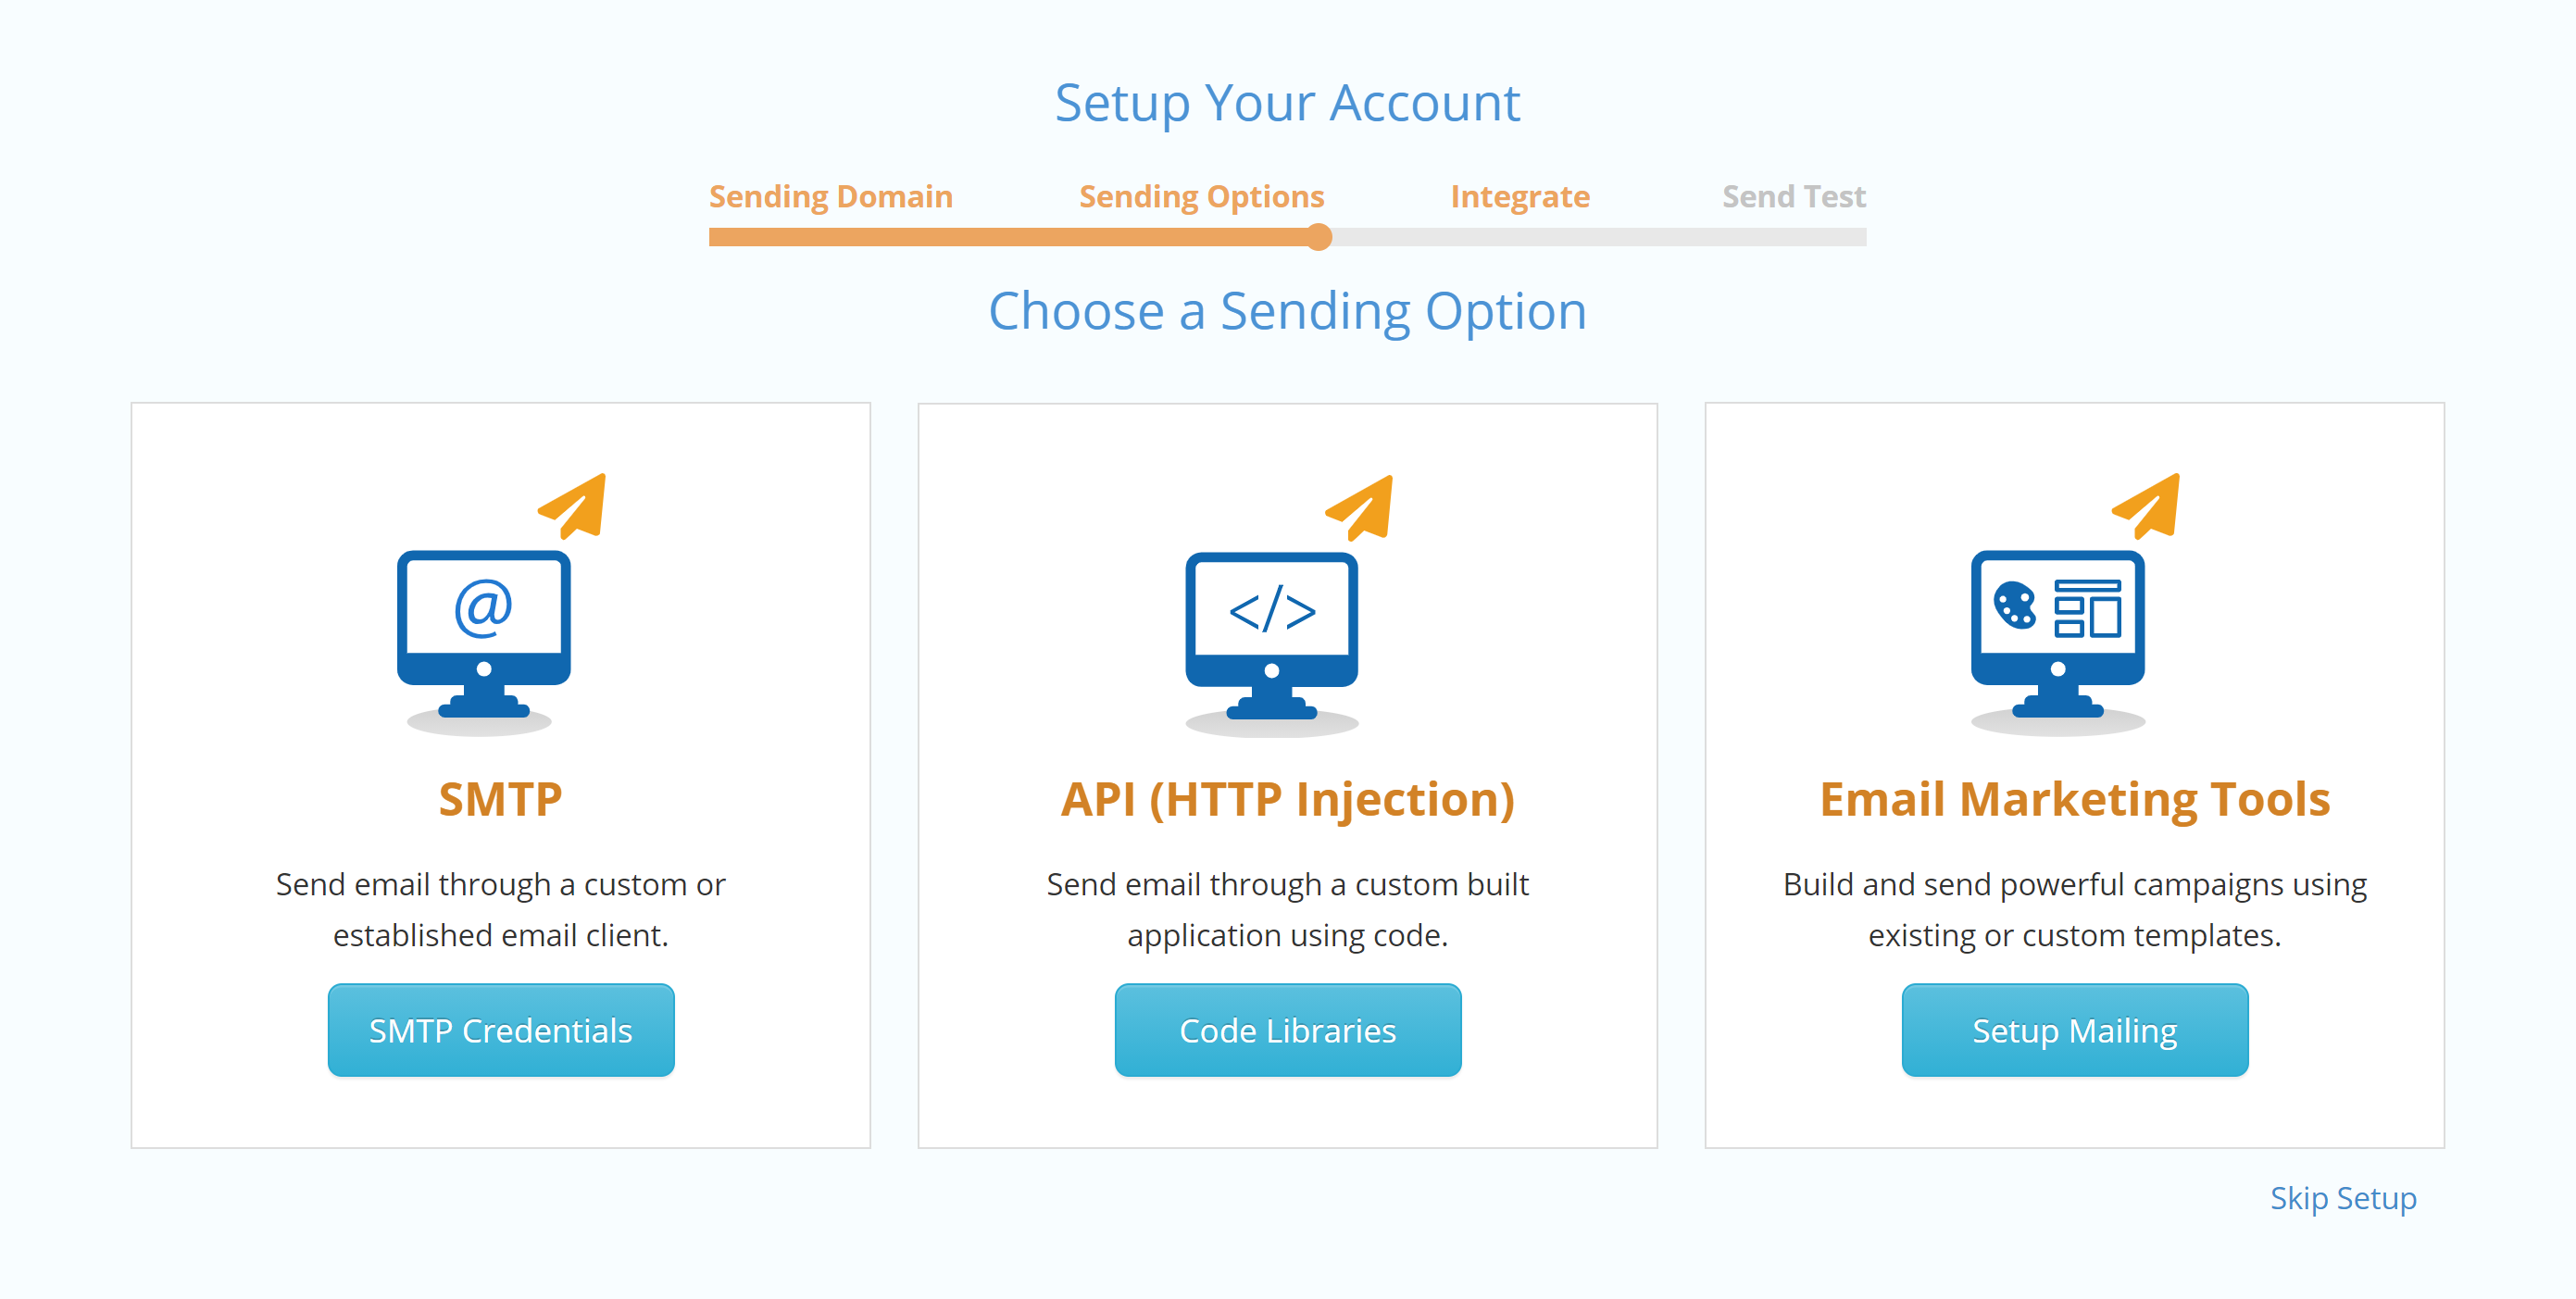
Step 2: Sending Options
Once you have configured the necessary sending domains that you will be using to send email, you will be guided to choose your sending method – SMTP, API, or Marketing Tools.
To better understand the pros and cons of SMTP and API, check out our comparison sheet here. If you are a marketer looking to take advantage of our marketing center with design templates and campaign management settings, you will likely want to opt for our email marketing tools option.
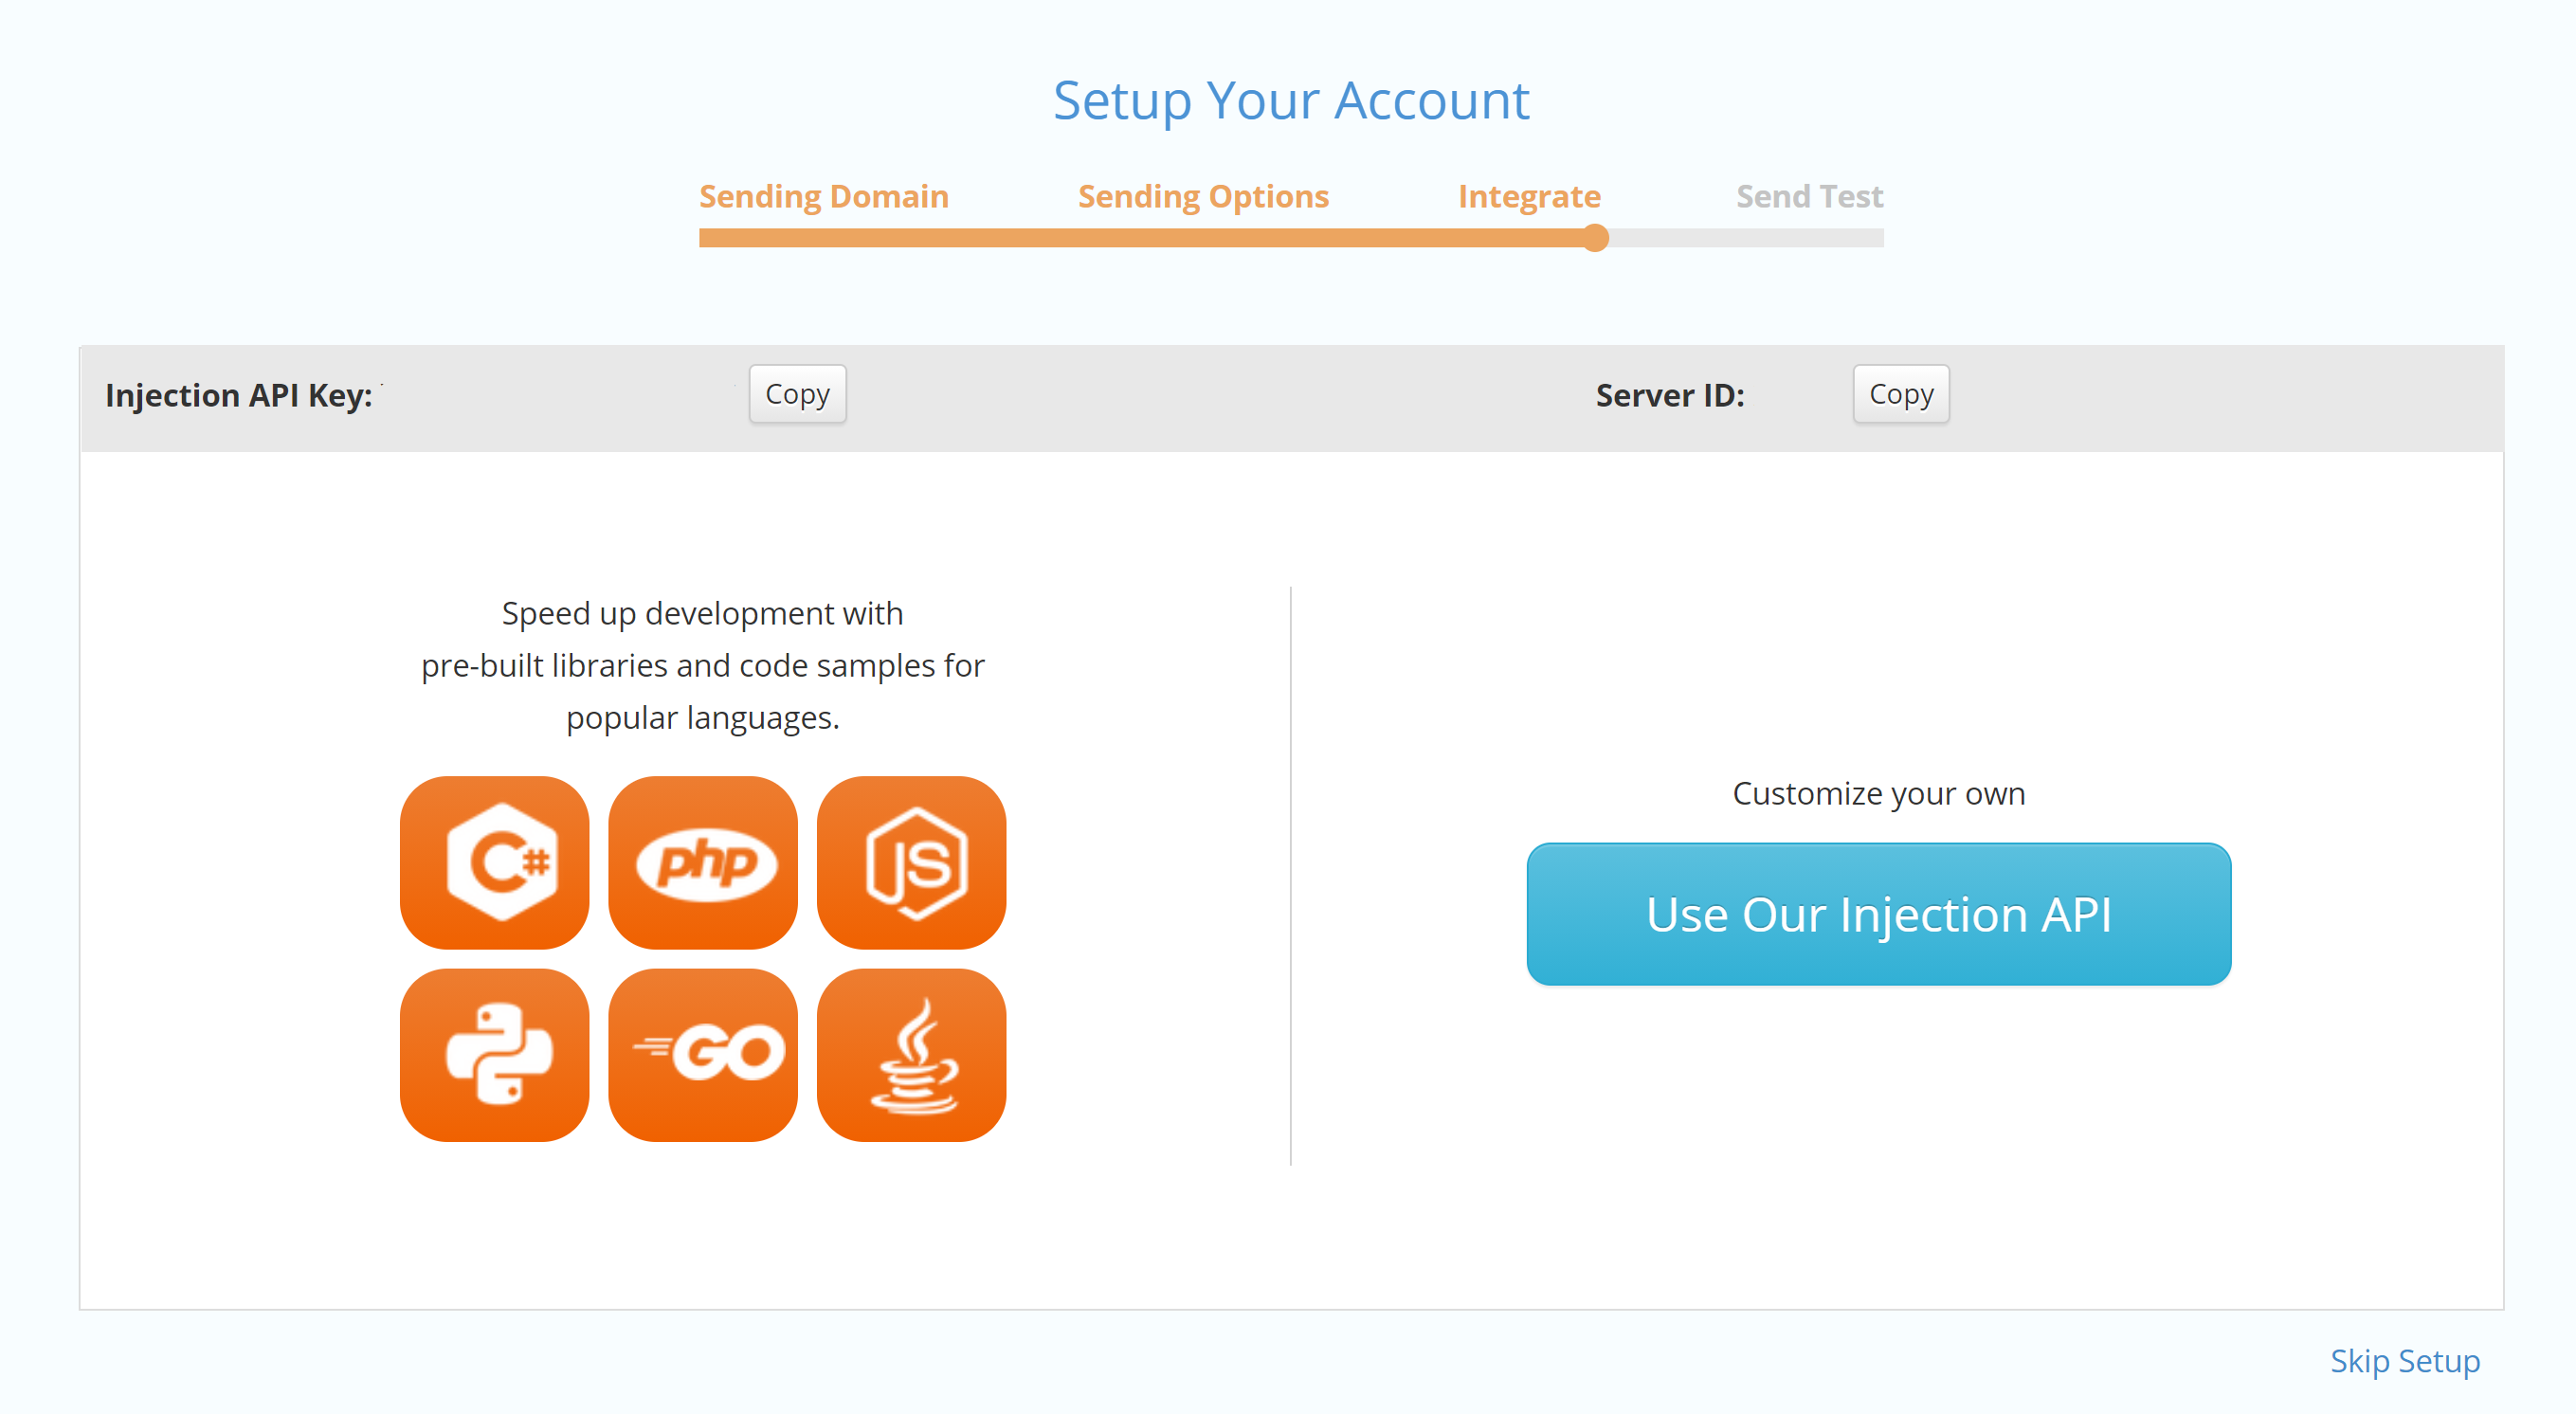
Step 3: Integration
In each sending method, there will be an associated integration page that will take you through the steps needed to send your first email with your chosen method.
The example image you see to the right will be shown in the Control Panel if you are sending via our API. Similar pages exist for SMTP and Marketing that will provide any guidance needed to get the necessary integration completed.
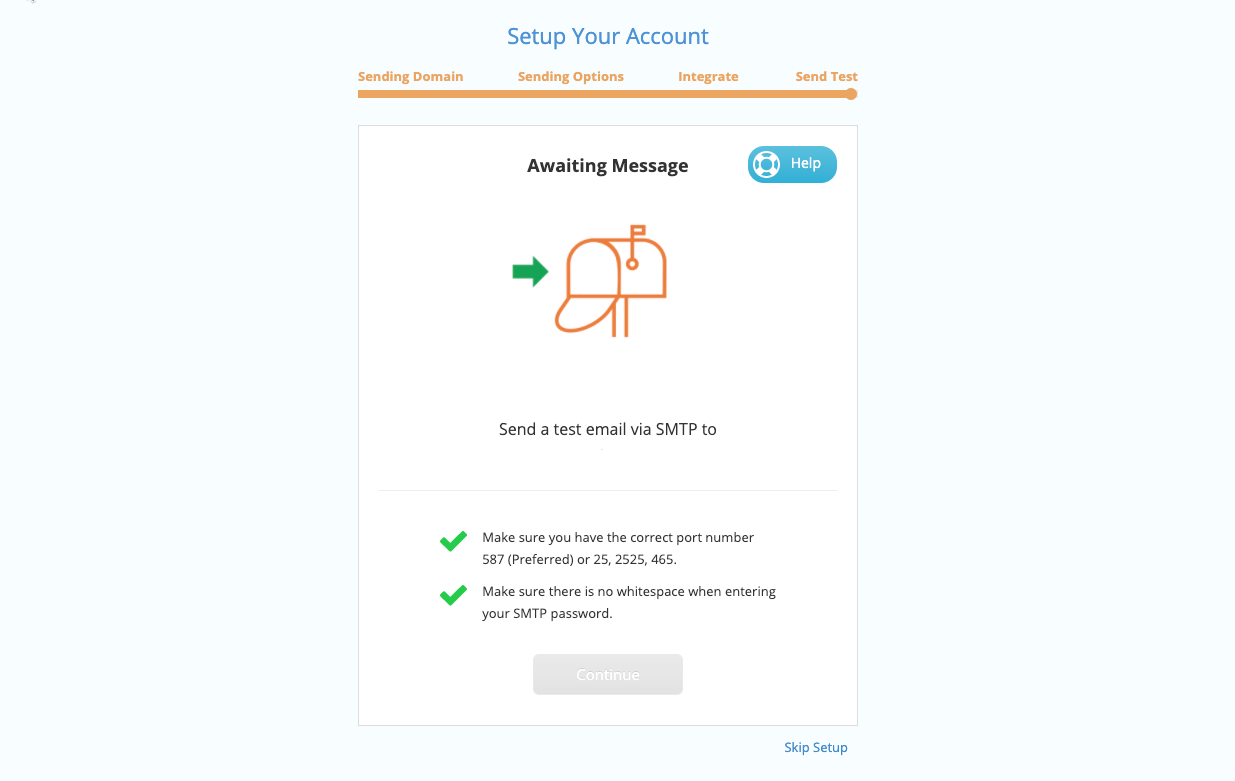
Step 4: Send Test Email
You made it! Now you should be ready to send your first email! You will be able to test your email via the provided address on the test page. The example image shown is what you will see when you choose to send with SMTP. (Make note of the tips provided below the test address to ensure everything works properly.)
Once the test email is sent successfully, you will see “Congratulations Messaged Received” along with a new mailbox icon, indicating success, at the top of this section! From here, you will be redirected to implement authentication as shown in the sections below.
Part 3
Authentication
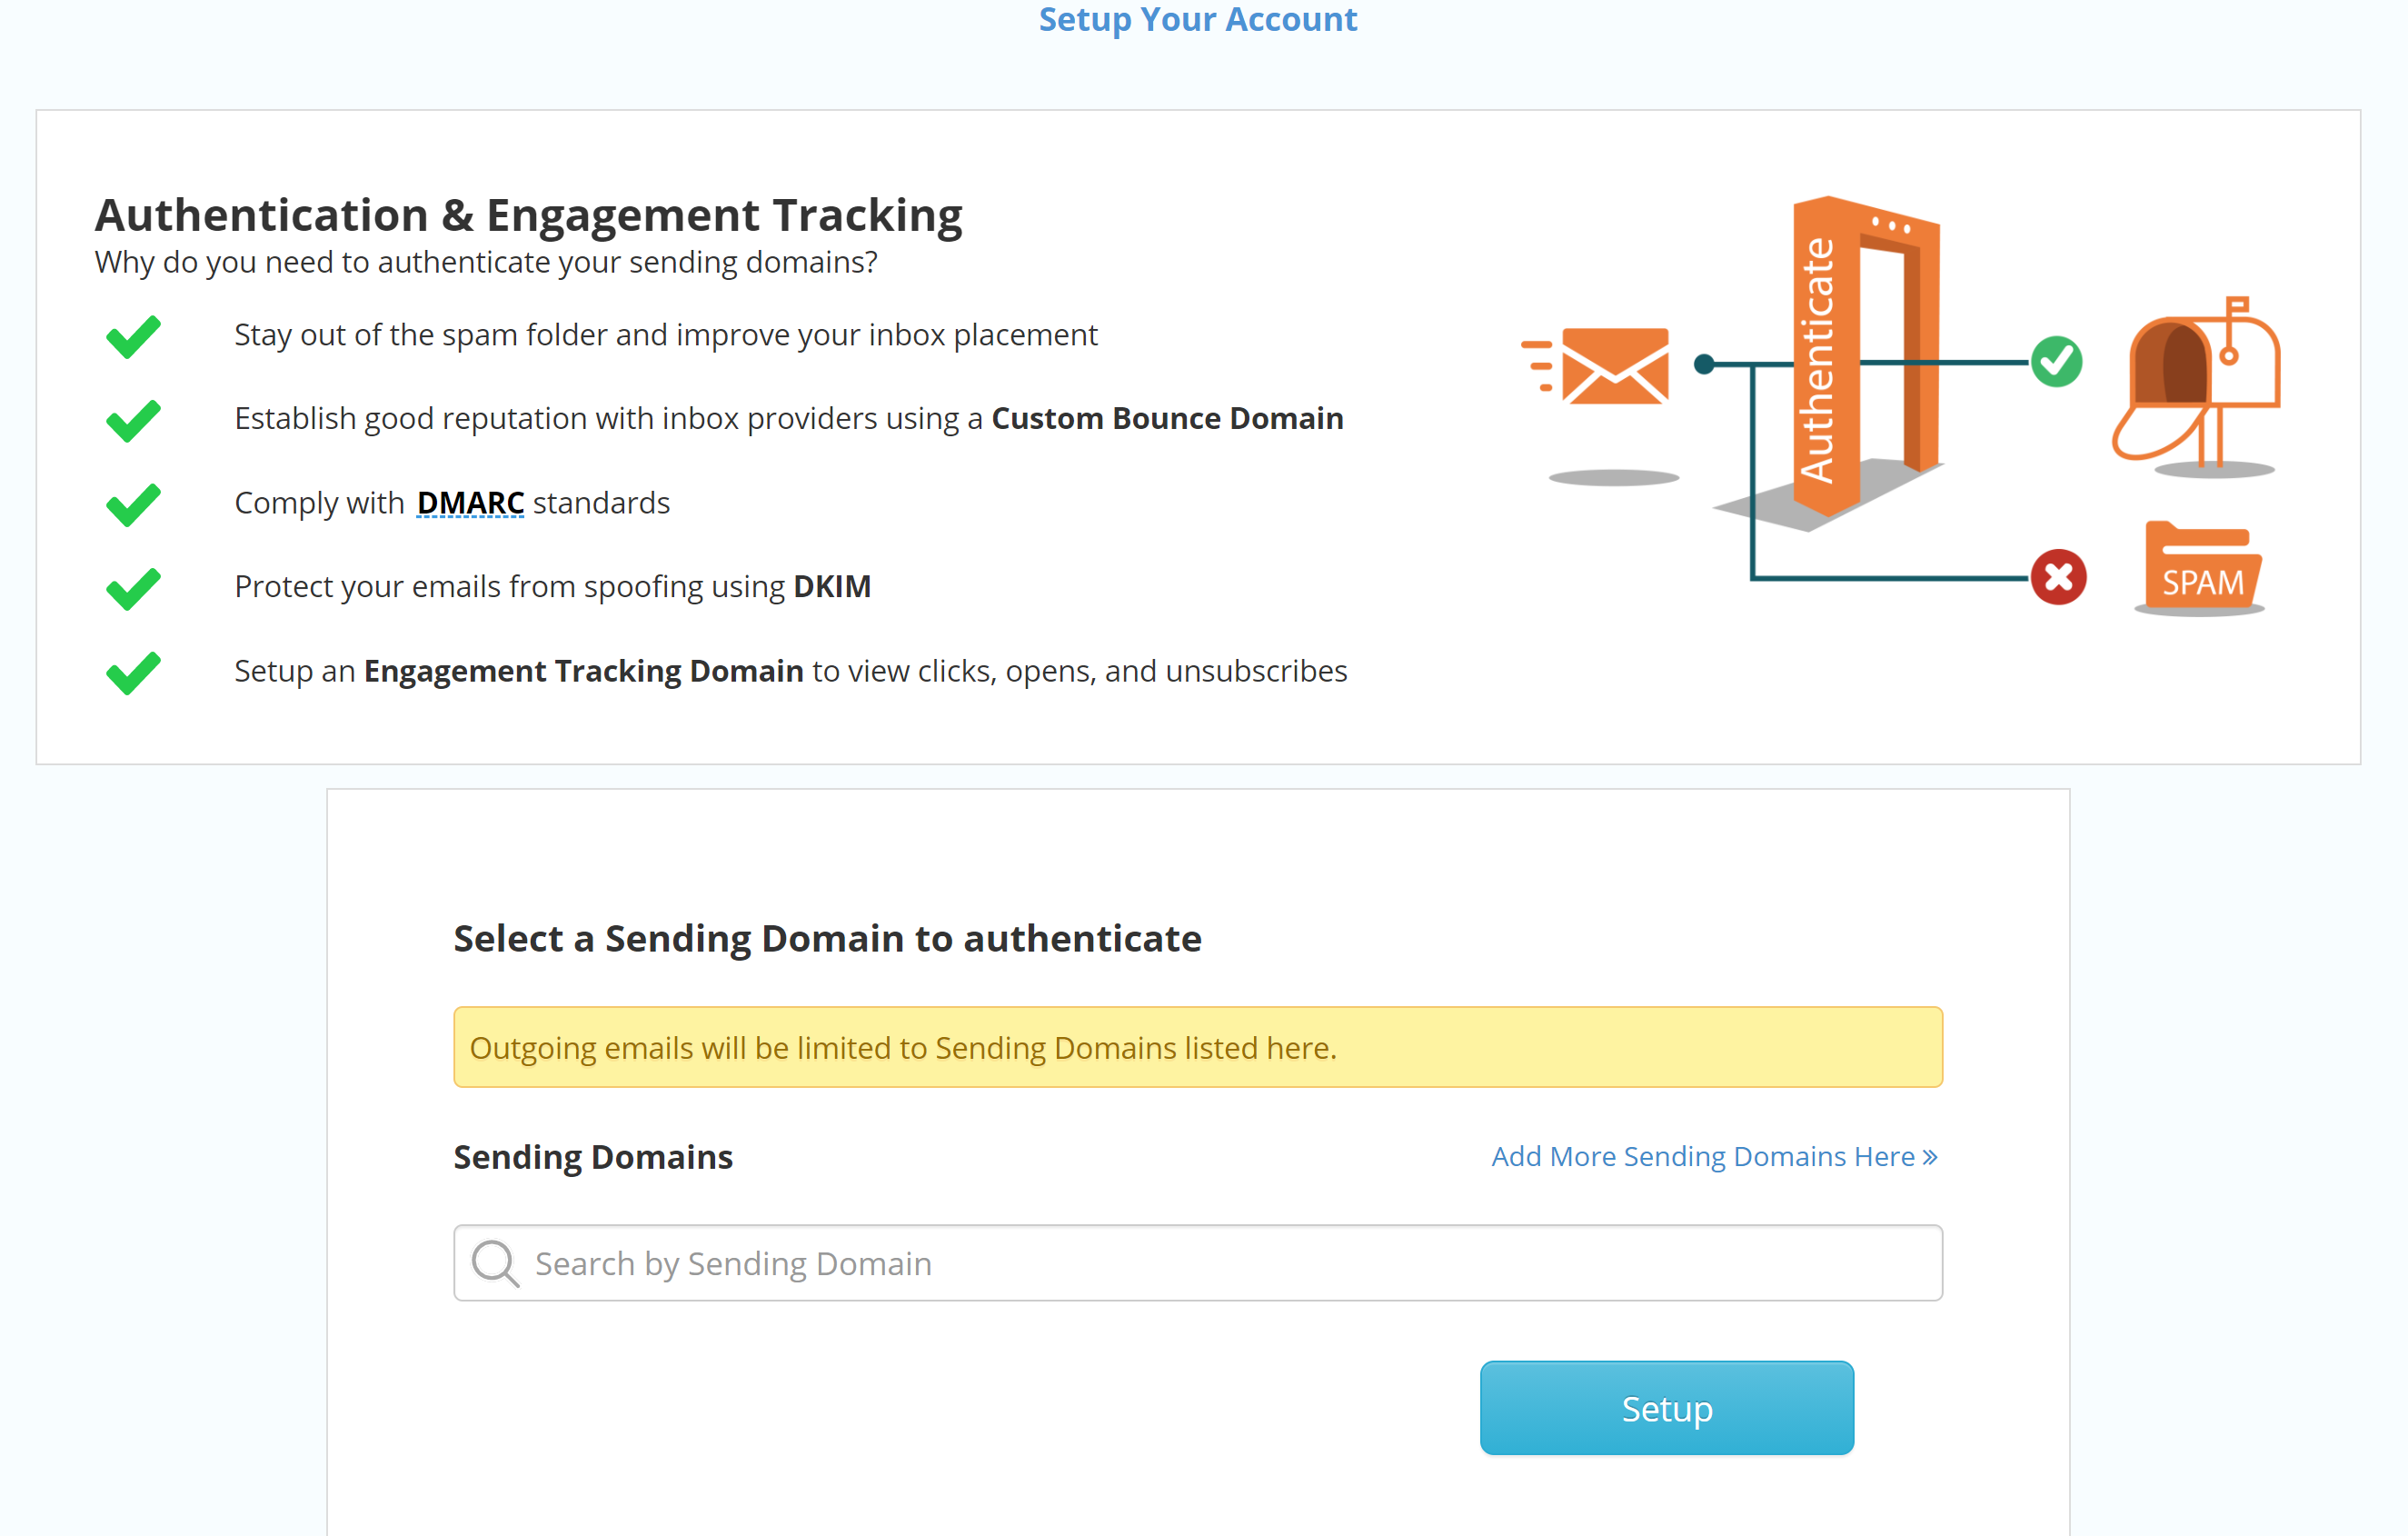
Step 1: Choose Domain for Authentication
Once you have gone through the process of sending your first email, as noted in the section above, you will be prompted to set up necessary domain authentication.
The first step in setting up authentication will be selecting the domain you would like to authenticate. Once you have chosen, click “Continue”.
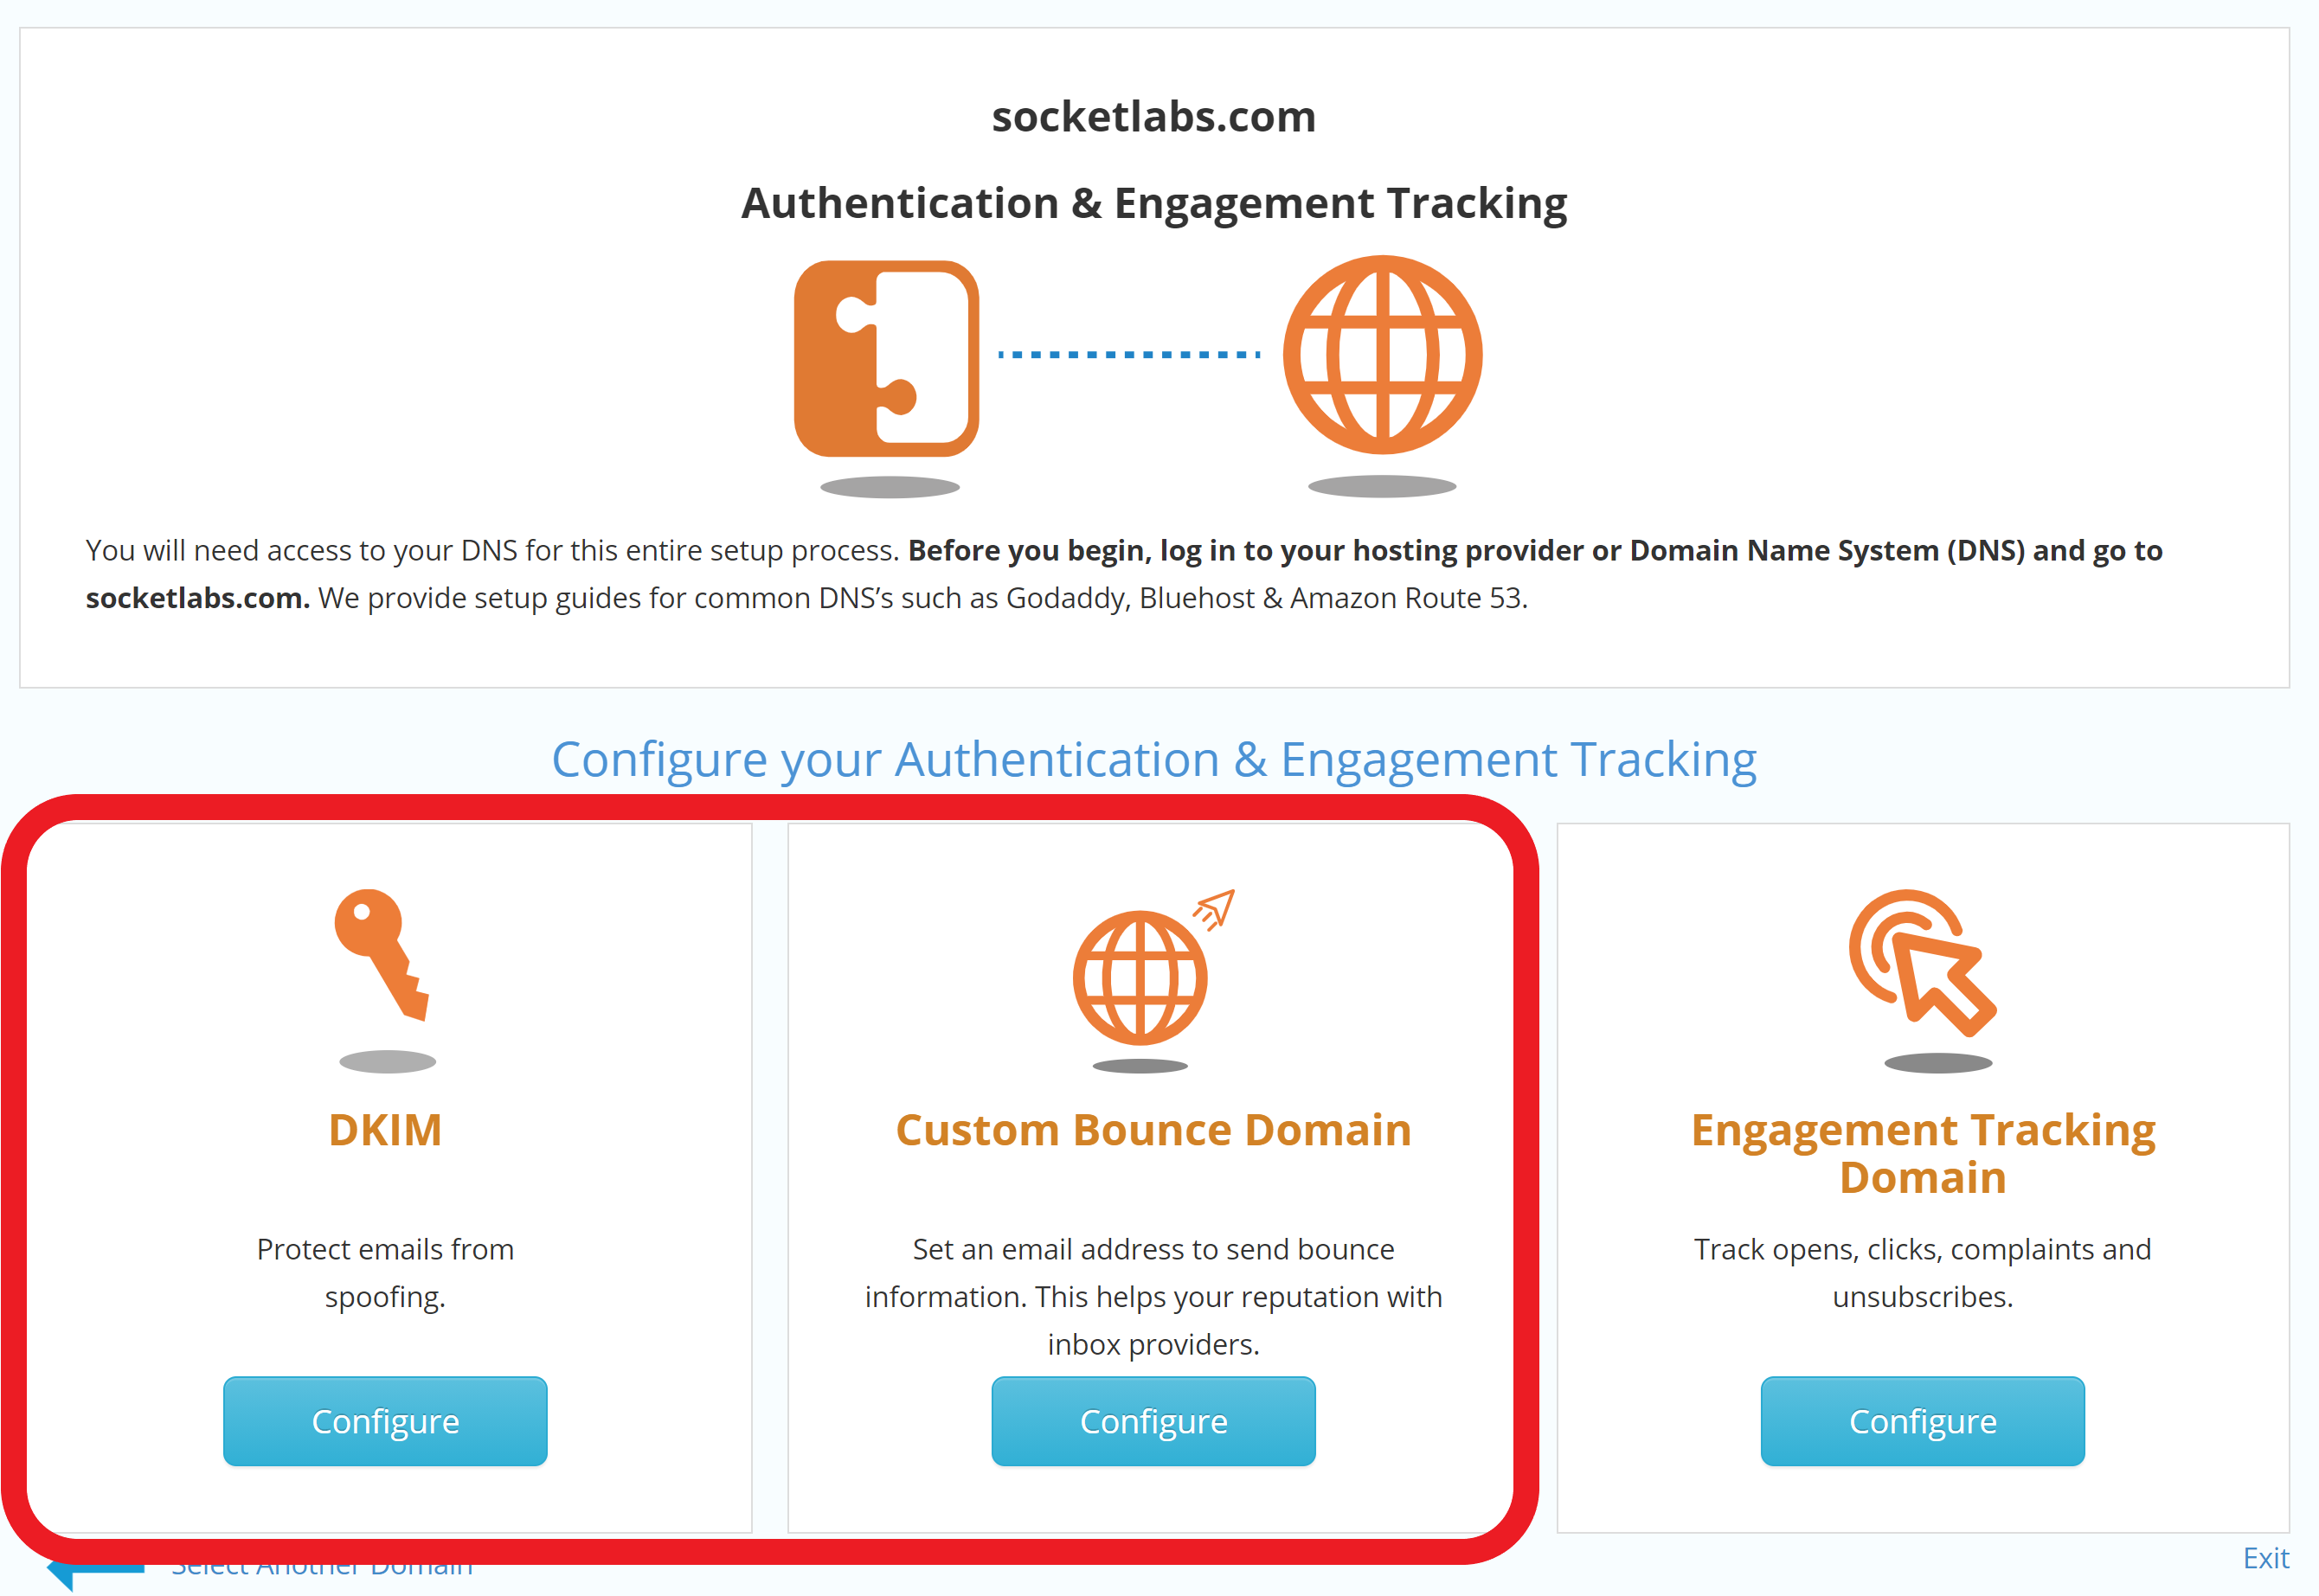
Step 2: Apply Authentication
Now, follow the steps indicated in the control panel to apply DKIM and Custom Bounce Domain Authentication.
Once both are configured correctly, you will see the “Domain Authentication” portion of the setup guide on the right margin of the control panel accompanied by a green circle.
For more in-depth information about email authentication and how it works, visit socketlabs.com/authentication!
Part 4
Engagement Tracking
Configure Engagement Tracking Domain
Now that you have the necessary authentication set up, you can proceed to configure your engagement tracking to get access to important metrics like clicks, opens, complaints, and unsubscribes.
This option can be found on the same Authentication and Engagement Tracking page shown earlier, next to “Custom Bounce Domain”. Follow the steps in the configuration to apply engagement tracking.
For this setup, you will need at access your DNS records. If you need help, check out our DNS configuration guides for many of the top DNS providers here.
![]()