

Intro: Why Read This C# Library Tutorial?
This C# Email Tutorial will show you how to enable email sending in your .NET application. Here’s a quick video intro covering exactly what we’ll discuss in this tutorial.
Adding reliable email sending to your .NET application can be a daunting task. Not only do you need to worry about building the message itself, you also need to consider many other factors such as message authentication and handling errors from receiving mail servers. Fortunately the SocketLabs Email Delivery .NET Client Library makes it easier than ever to add email sending to your .NET application in just a few minutes.
Prerequisites to Sending Email In .NET Using Our C# Library
In order to get started, all you need is a SocketLabs account and an application in a supported .NET version. If you don’t have a SocketLabs account yet, you can sign up for a free one here. Supported .NET versions are:
- .NET version 4.5 or higher
- .NET Core 1.0 or higher
- .NET Standard 1.3 or higher
For this tutorial, we’ll be creating a new .NET Core console application in Visual Studio. The steps will be similar for other environments, and we’ll be sure to point out any major differences.
Getting Started: Using Visual Studio to Send Email With Our C# Library
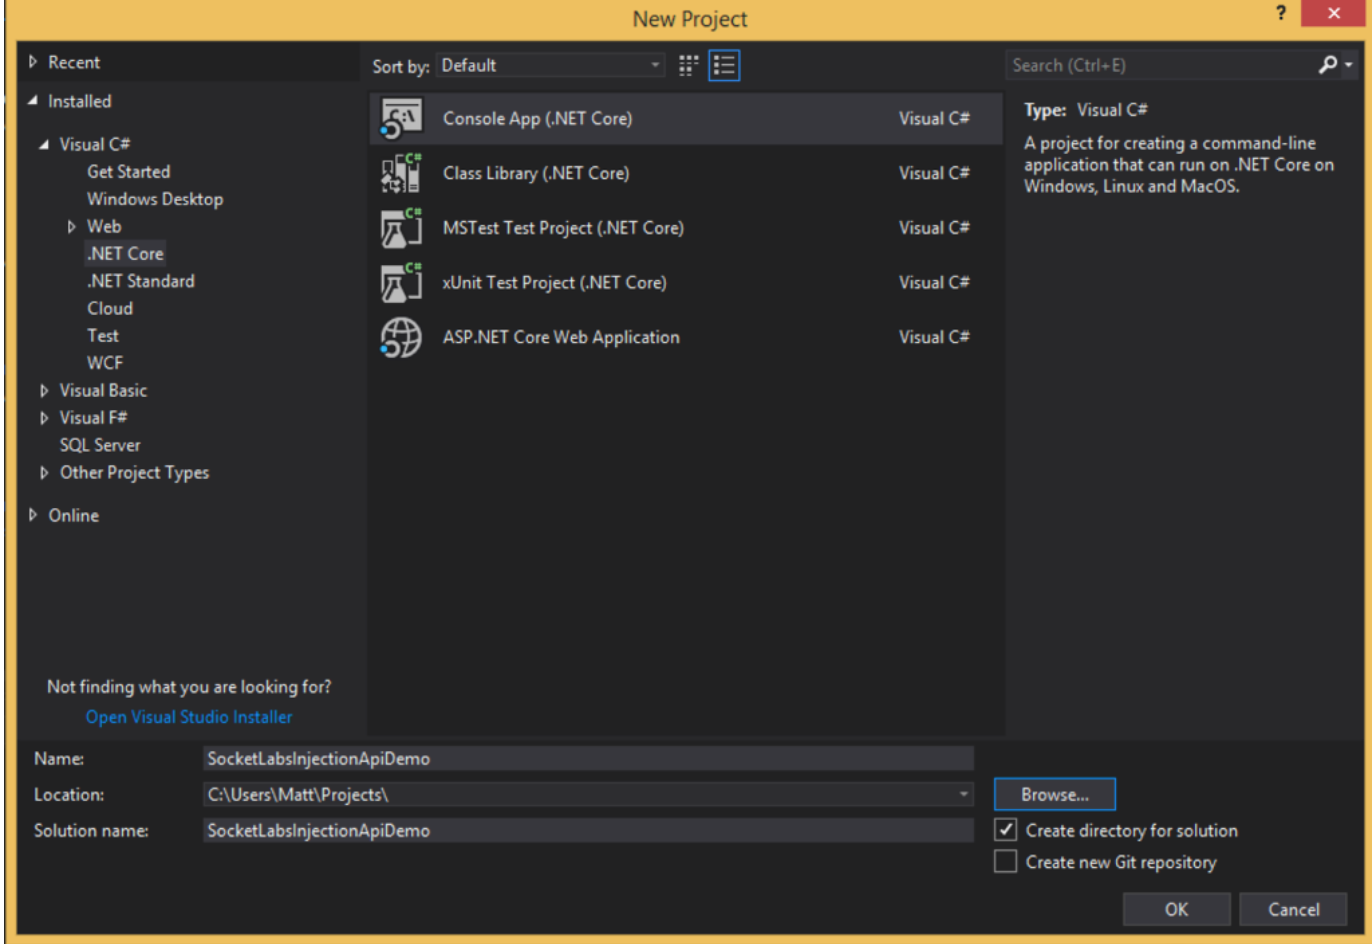
Step 1 – Create the Application
For this tutorial we are going to create a new .NET Core console application in Visual Studio 2017.
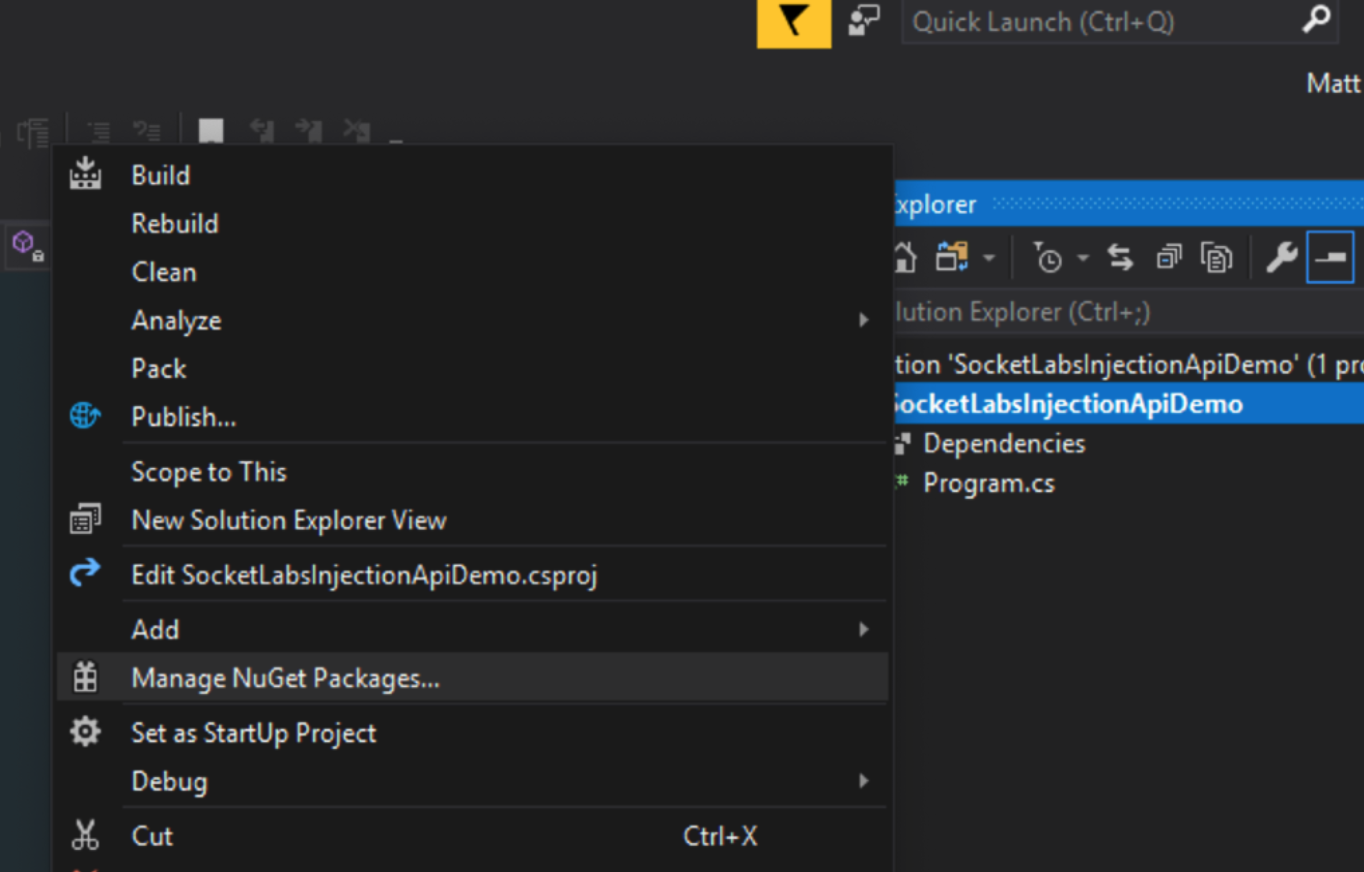
Step 2 – Install the Library
Once the application is created we need to install the SocketLabs.EmailDelivery NuGet package. In the Solution Explorer, right click on the newly created project and select “Manage NuGet Packages…”
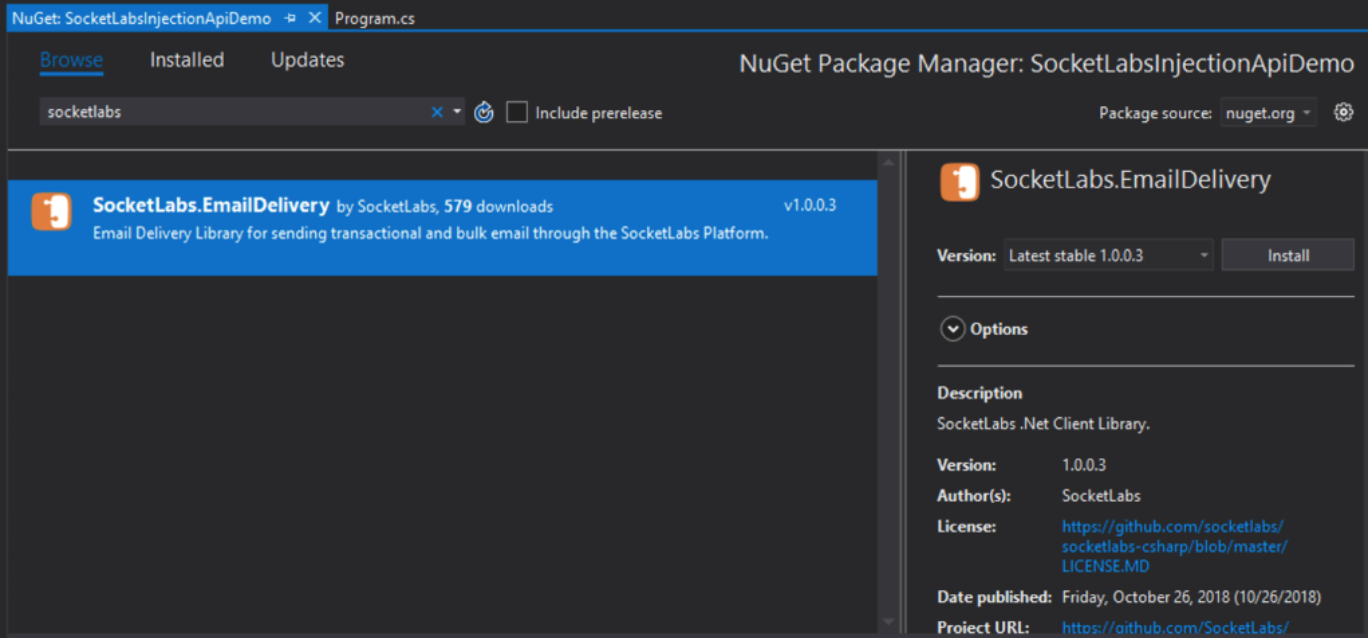
In the NuGet Package Manager window make sure the “Browse” tab is selected, and type “SocketLabs” into the search bar. Choose the SocketLabs.EmailDelivery package and install the latest version.
Tip: You can also install the package from the NuGet Package Manager Console with the following command:
PM> Install-Package SocketLabs.EmailDelivery
.NET CLI users can install the package using this command:
> dotnet add package SocketLabs.EmailDelivery
Step 3 – Obtain Injection API Key to Access Our Send Email API
Before you start writing any code, you’ll want to retrieve your Injection API key. This is used to authenticate your API calls to SocketLabs. To find your API key you’ll need to log in to the SocketLabs Control Panel. If this is your first time logging in you may be asked to verify your email address.
If this is your first time logging in or if you have not sent any messages with your SocketLabs account, you’ll be presented with three options once you are logged in. To find your Injection API credential, choose the “Web API” option.
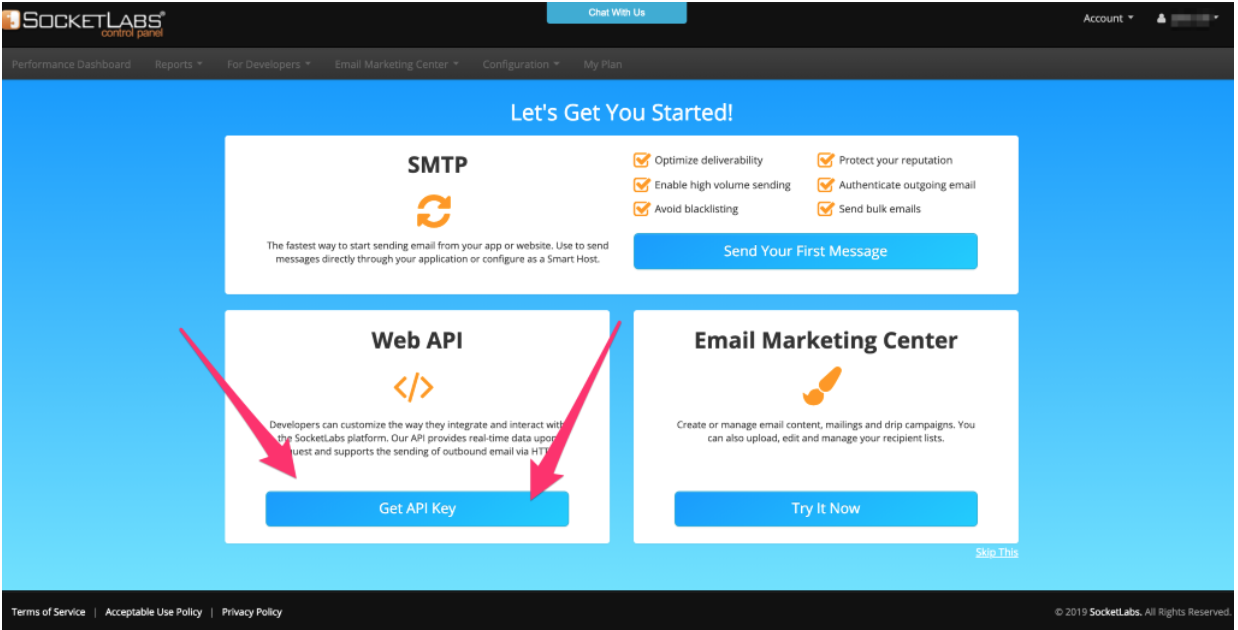
If you’ve already sent messages through your account, you can also find your API key by choosing “Configure Injection API” in the “For Developers” dropdown in the top navigation bar.
You can find your Injection API Key in the gray box that’s located at the top of the “Send Your First Email” page (see screenshot below).

Step 4 – Time to Write Some Code!
Now that you have your Injection API key, it’s time to return to Visual Studio. In the console application that you created, open up the Program.cs file. Inside of the Main() method, and replace the existing code with the following code, filling in your serverId and Injection API Key with the credentials that you received from the SocketLabs Control Panel. Feel free to modify any of the message properties as you see fit, especially the To and From addresses.
var serverId = XXXXX;
var injectionApiKey = "XXXXXXXXXXXXX";

var client = new SocketLabsClient(serverId, injectionApiKey);
var message = new BasicMessage();

message.Subject = "Sending A Basic Message";
message.HtmlBody = "This is the Html Body of my message.";
message.PlainTextBody = "This is the Plain Text Body of my message.";
message.From.Email = "[email protected]";
message.To.Add("[email protected]");

var response = client.Send(message);
Console.WriteLine(response);
Console.Read(); //Keep the console open to see the response
Tip: If you have not referenced the NuGet package yet, Visual Studio should prompt you to add the necessary references once you paste this code in. If Visual Studio doesn’t prompt you or if you are using another editor, you may need to manually add the following references:
using SocketLabs.InjectionApi;
using SocketLabs.InjectionApi.Message;
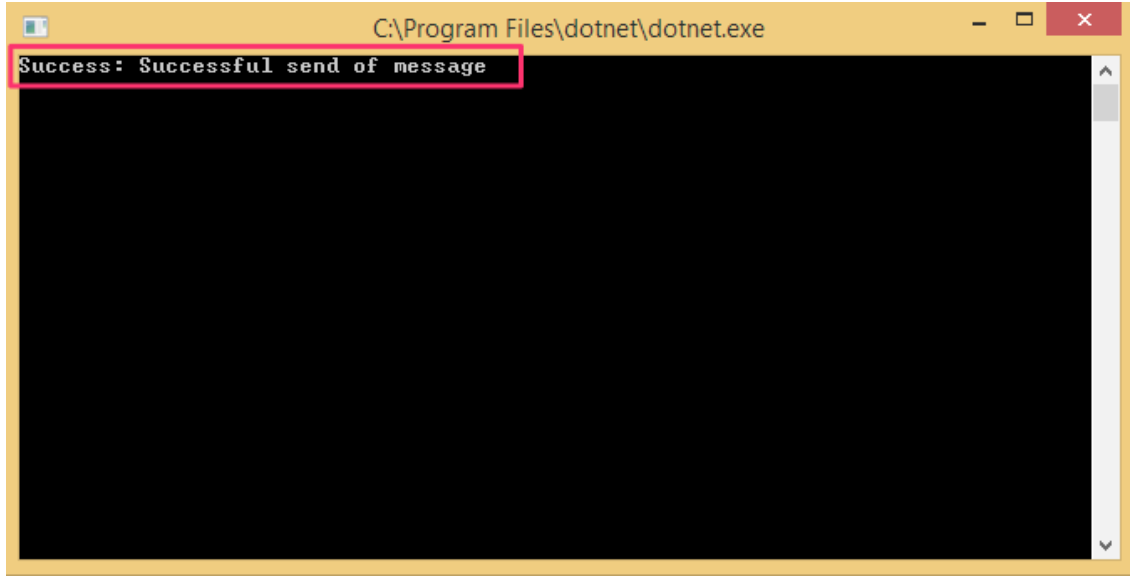
Once this is done, go ahead and run your program! If everything works correctly, you should see a success message in your console, like this:
Otherwise, you should see an error message describing what went wrong with your API call.
Important Security Note:
For ease of demonstration, this tutorial includes the ServerId and API key directly in our code. Generally it is not considered a good practice to store sensitive information like this directly in your code. Depending on your project type, we recommend either storing your credentials in an app.config or a web.config file, or using Environment Variables. For more information please see:
What’s Next?
Once you’ve set up your .NET application to send email using the SocketLabs.EmailDelivery library, there are some additional steps that you may wish to take to further optimize the deliverability of your email. These include setting up the authentication and white-labeling features that are available for your SocketLabs account, such as Custom DKIM signing, Custom Bounce Domain, and Engagement Tracking.
To start sending email from your .NET application visit our C# Library for Sending Email »
To learn more about our full suite of APIs and libraries visit our Developer Hub.