
With even more access to marketing data, marketers are focusing more on personalization of email. According to emarketer.com, over 67% of US marketers are using data to personalize their email messages.
When it comes to tactically creating a personalized email on the SocketLabs platform, custom fields will help you accomplish this. That’s why:
We’ve improved custom fields to help you send more personalized and engaging emails
If you are a SocketLabs user, then you probably know that the custom field functionality was already available before the improvements. So, what has changed?
Well, we have completely overhauled custom fields to give you a more streamlined experience for creating and managing custom fields in your account.
Improvements include:
- A more organized process for creating and mapping custom fields.
- Improved custom field management with the all-new custom field management tool.
- A few additional bells and whistles that we’ll cover throughout this post. So keep reading…
Now that we covered some of the basic enhancements, let’s take a closer look at the improvements and how you can benefit by making custom fields part of your strategy, today.
How to use custom fields to send an engaging email from start to finish
First, we are going to start by uploading an email list with custom fields.
For this example, let’s assume that you’re an auto mechanic.
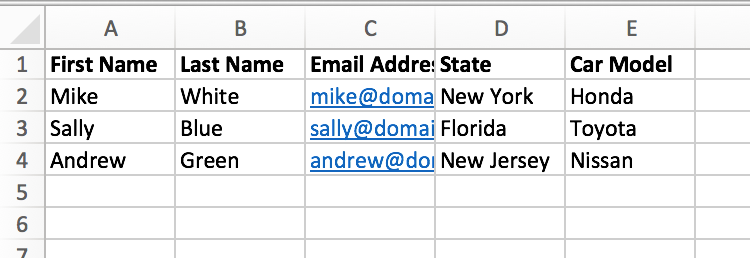
The spreadsheet below is a sample sheet of some of your customers. This list contains three contacts and five columns.
Best Practice Tip: Do not use lists obtained from a third party and ensure that your recipients have given consent to receive email from you.
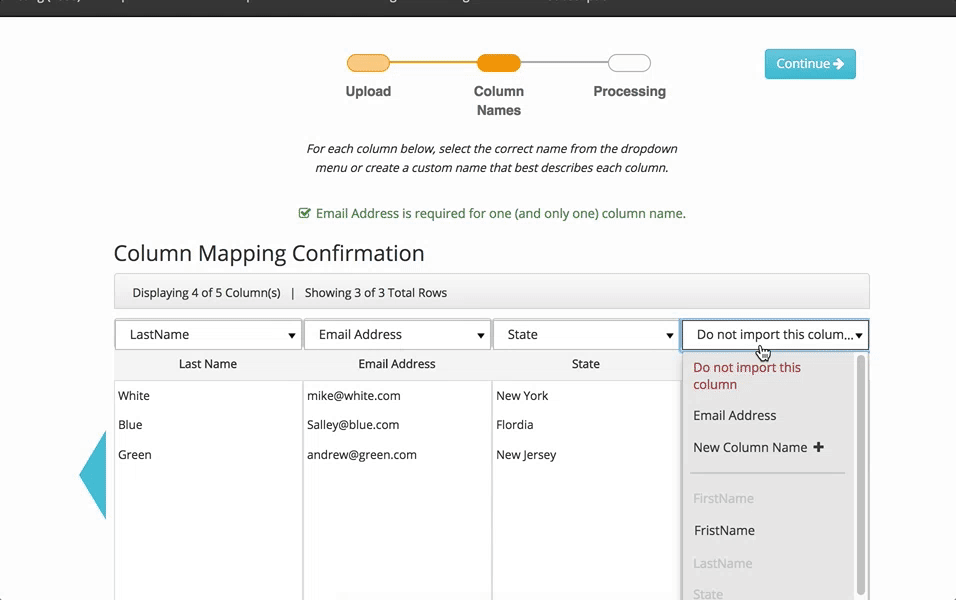
First, let’s quickly map First Name, Last Name, Email Address and State to the appropriate custom fields:
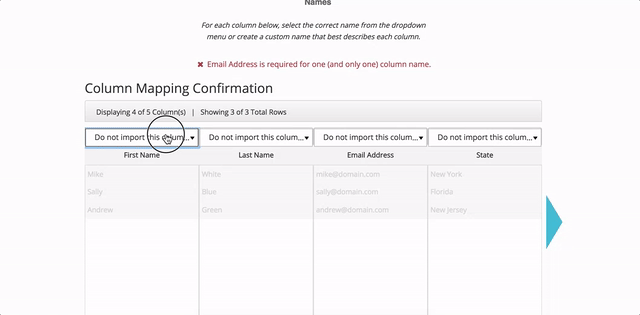
An improved custom field mapping process is just one of the many enhancements that we made with our recent improvements to custom fields.
If you look at the spreadsheet above, then you’ll see that Column E (Car Model) is very custom. In this example, we don’t have a custom field called Car Model, so you’ll need to create this field. Luckily, with the recent improvements to custom fields, accomplishing this is a breeze.
In less than three simple steps, you have just created a custom field for the Car Model Column.
- You clicked New Custom Field Name +
- An overlay appeared and you named the custom field “Car Model” – Note, you can also look for a custom field in the recommended list (we’ll get to this soon)…
- Then you clicked Create
Pro Tip: With this newly added custom field, you can add it to the subject line or body of your email. Doing so could help increase your email open rates. For more information about how to improve your email open rates, read this post.
If you’re an existing SocketLabs user, then this is where you might be thinking…
But wait! How can I manage all of these custom fields?
Don’t worry, we have that all figured out too.
Let’s assume that you have another data point that you want to add to your customer list. We’ll call this data point Last Visit, which represents the last time that one of your subscribers had their car tuned up by your mechanics.
You’ll simply need to create this custom field in the new Custom Field Management area of your SocketLabs account, and it’s pretty easy…
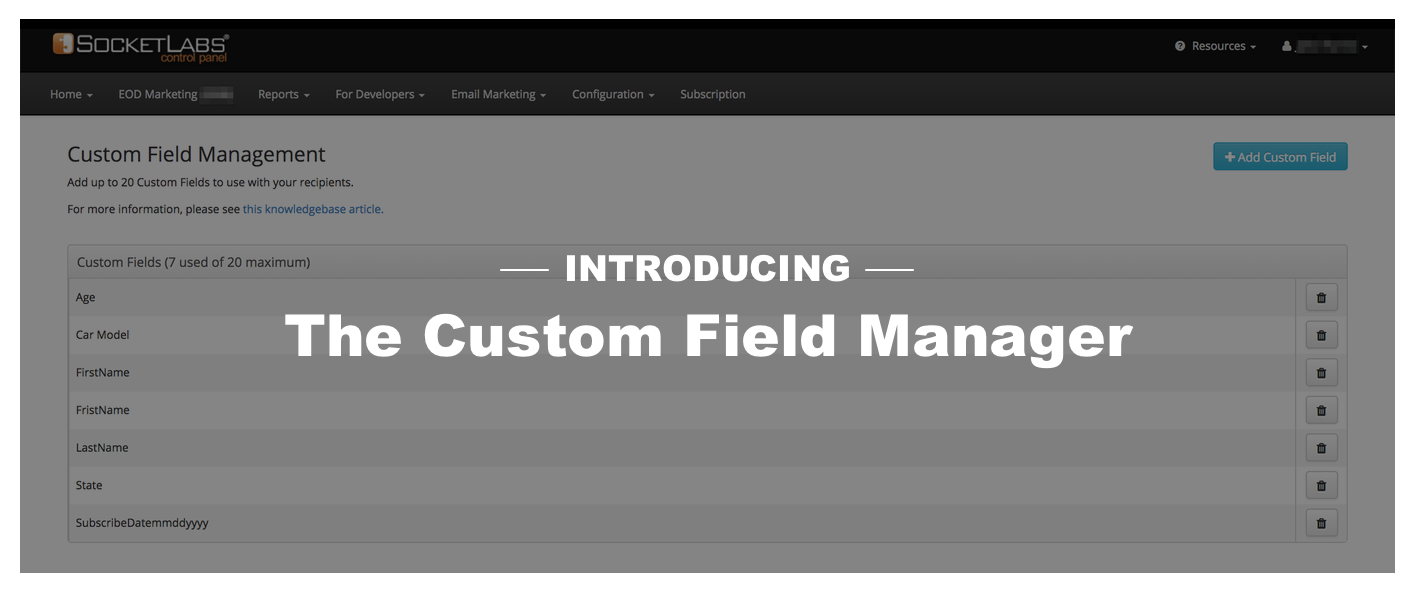
The new Custom Field Manager makes it easy for you to create and manage your entire list of custom fields, so you don’t lose track of anything.
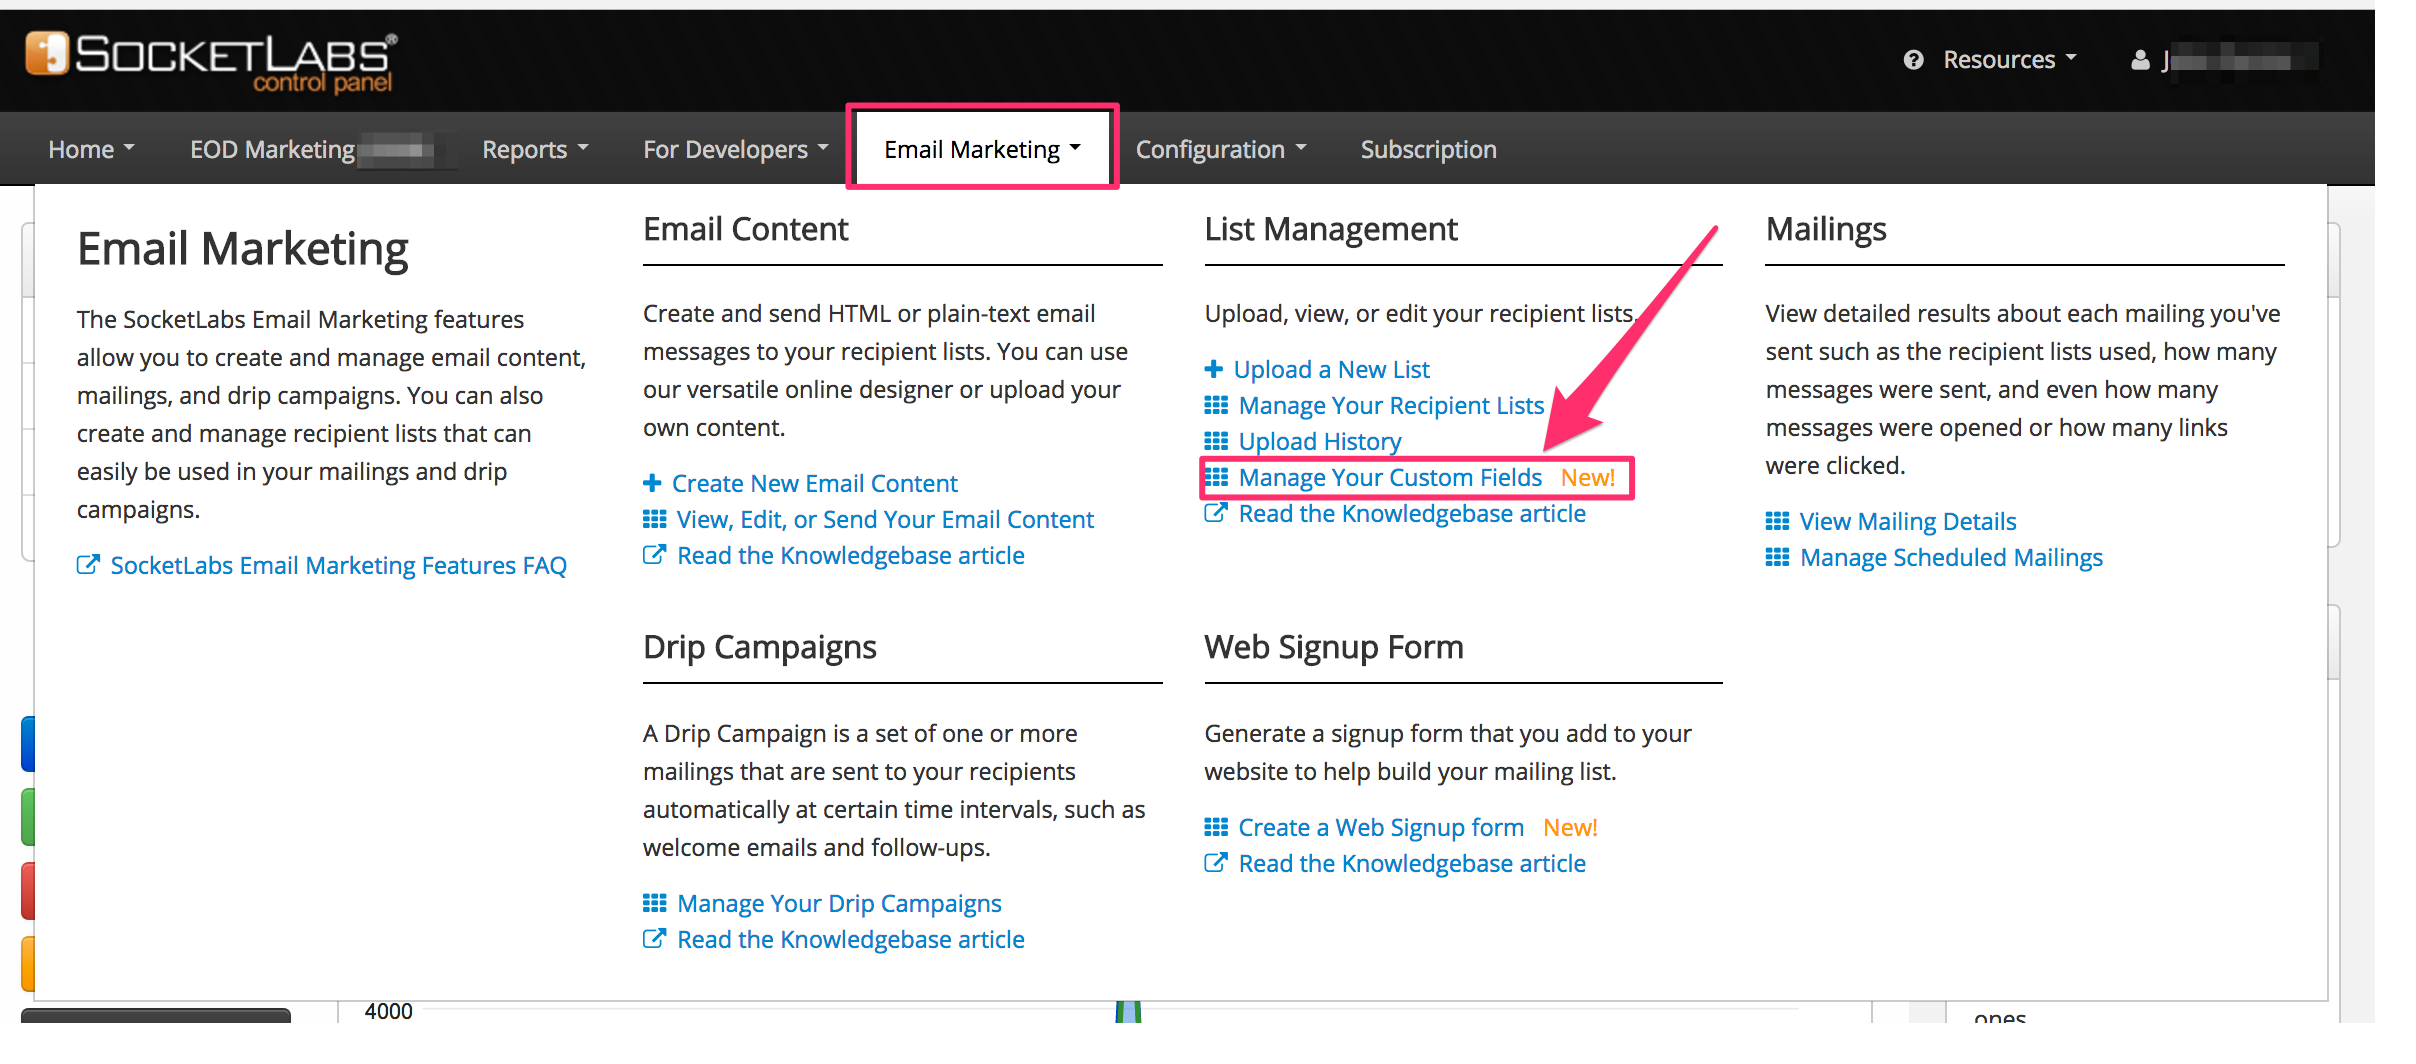
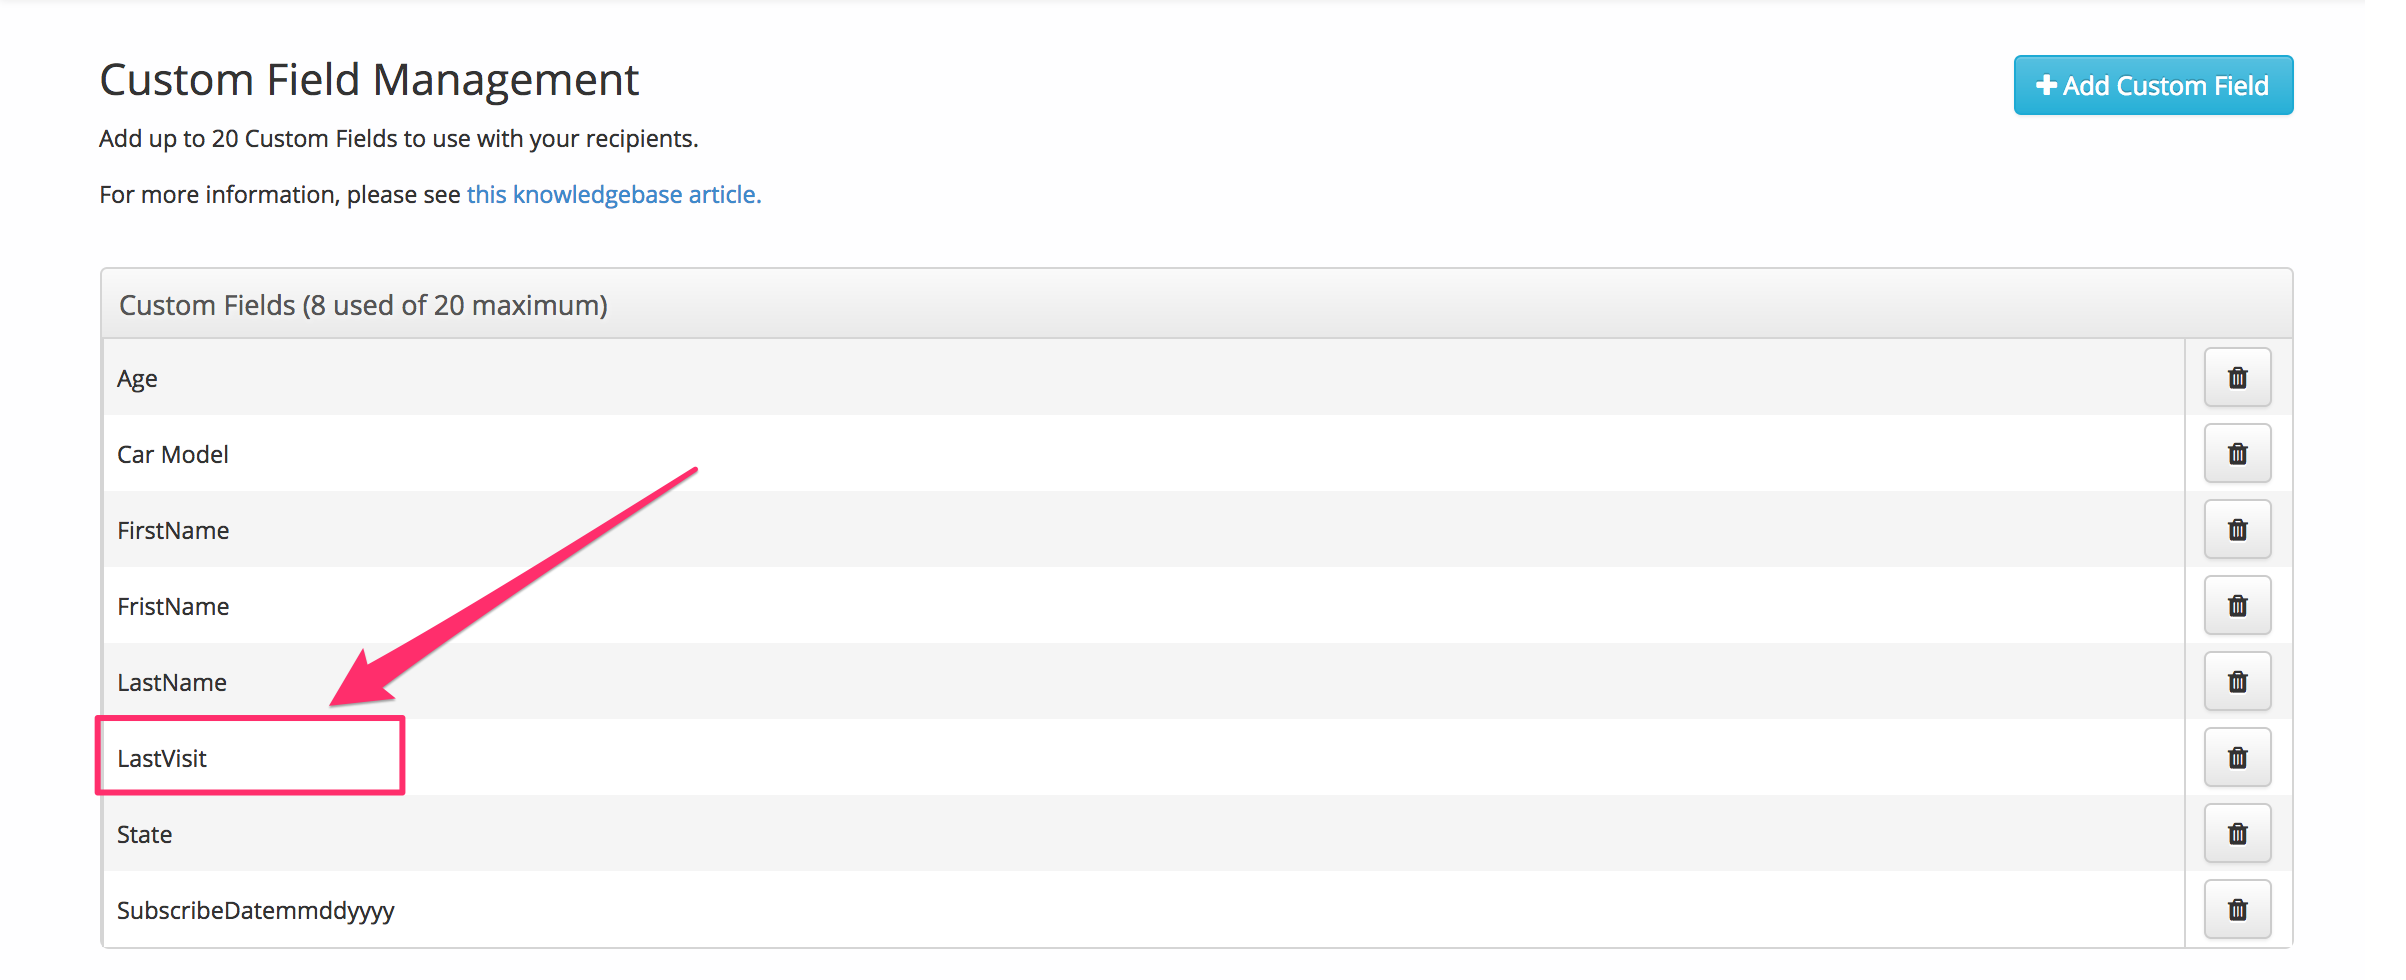
To visit your Custom Field Manager so you can add the Last Visit field, simply go to Email Marketing > Manage Your Custom Fields.
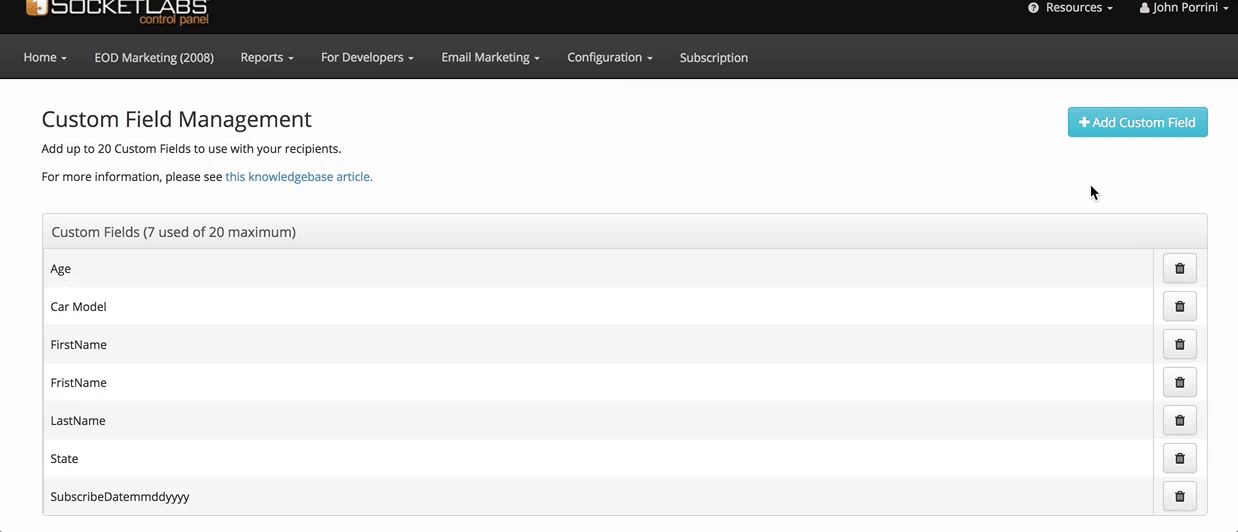
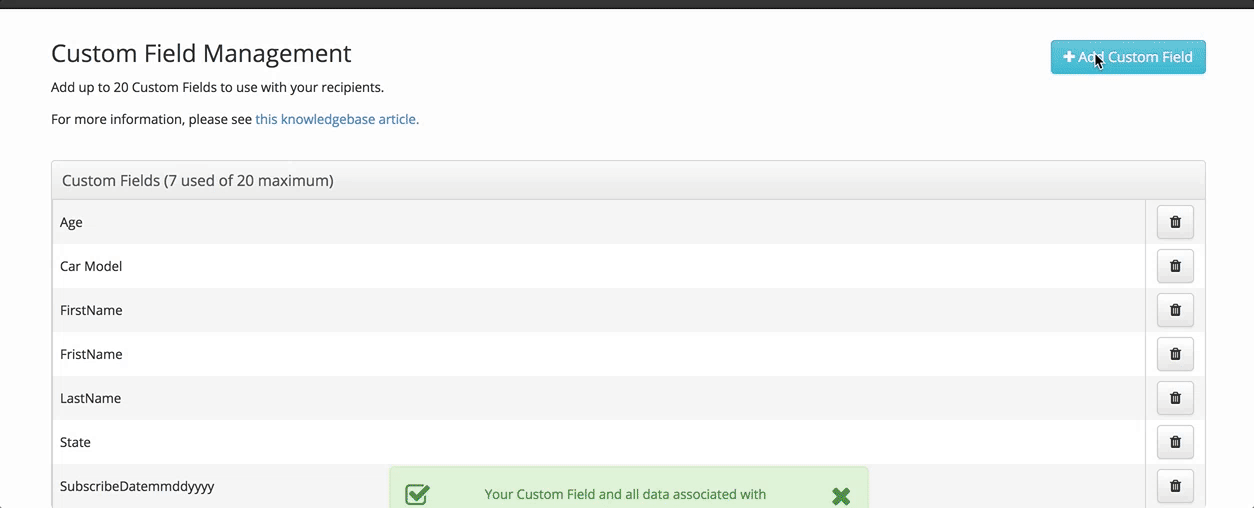
You’ll see up to 20 custom fields on this page. Notice that some of the custom fields that you already added, such as Car Model, appear in the list:
After you click on the blue + Add Custom Field button, an overlay will open on your screen:
Before we create a custom field for Last Visit, let’s take a closer look at the Custom Field Creator:

Here are a few key things to note about the Custom Field Creator:
1. Custom field status bar: Currently, you can have a maximum of 20 custom fields for each SocketLabs server. The status bar helps you stay organized by filling the empty space as you get closer to reaching the maximum number of custom fields, so you never have to worry about keeping track yourself.
2. Existing fields: Not sure if the custom field that you’re creating currently exists? You can find it in the existing custom field box.
3. Recommended fields: If you need some ideas for custom fields, then the recommended fields box will help. This extremely useful feature will give you ideas about the different types of custom fields that you can create. You can even select a custom field from the list.
4. Custom field name: Finally, to create a custom field, just type the name of your field into the form.
Now that you had a quick crash course in creating a new custom field, let’s go back to our example and create a custom field for the last time a subscriber had a tuneup for their car (Last Visit).
Since Last Visit isn’t an existing or recommended field, you’ll need to type the name of the field into the Custom Field Name form, then click Create, like in the above example.
As you can see from the image below, Last Visit has been added.
Yes, it’s really that easy!
But, what if you need to update existing contact records? Well,
You can even update existing contacts with your new custom field data
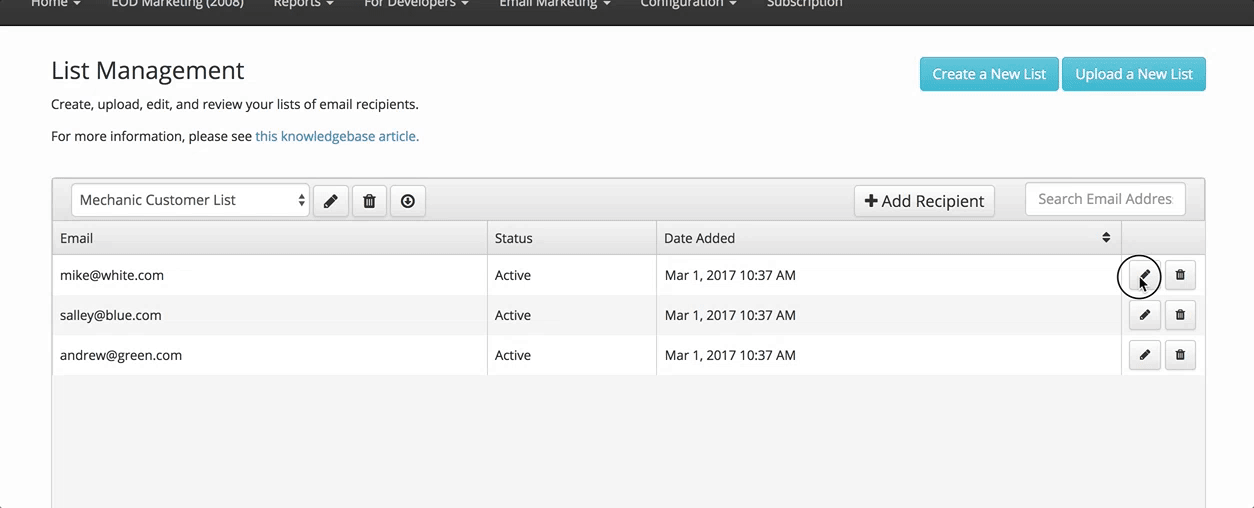
First, let’s visit the contact section of your SocketLabs account.
After looking at the image below, you’ll notice that the custom field that you just created is now attached to each contact (remember, in this example you are a car mechanic).
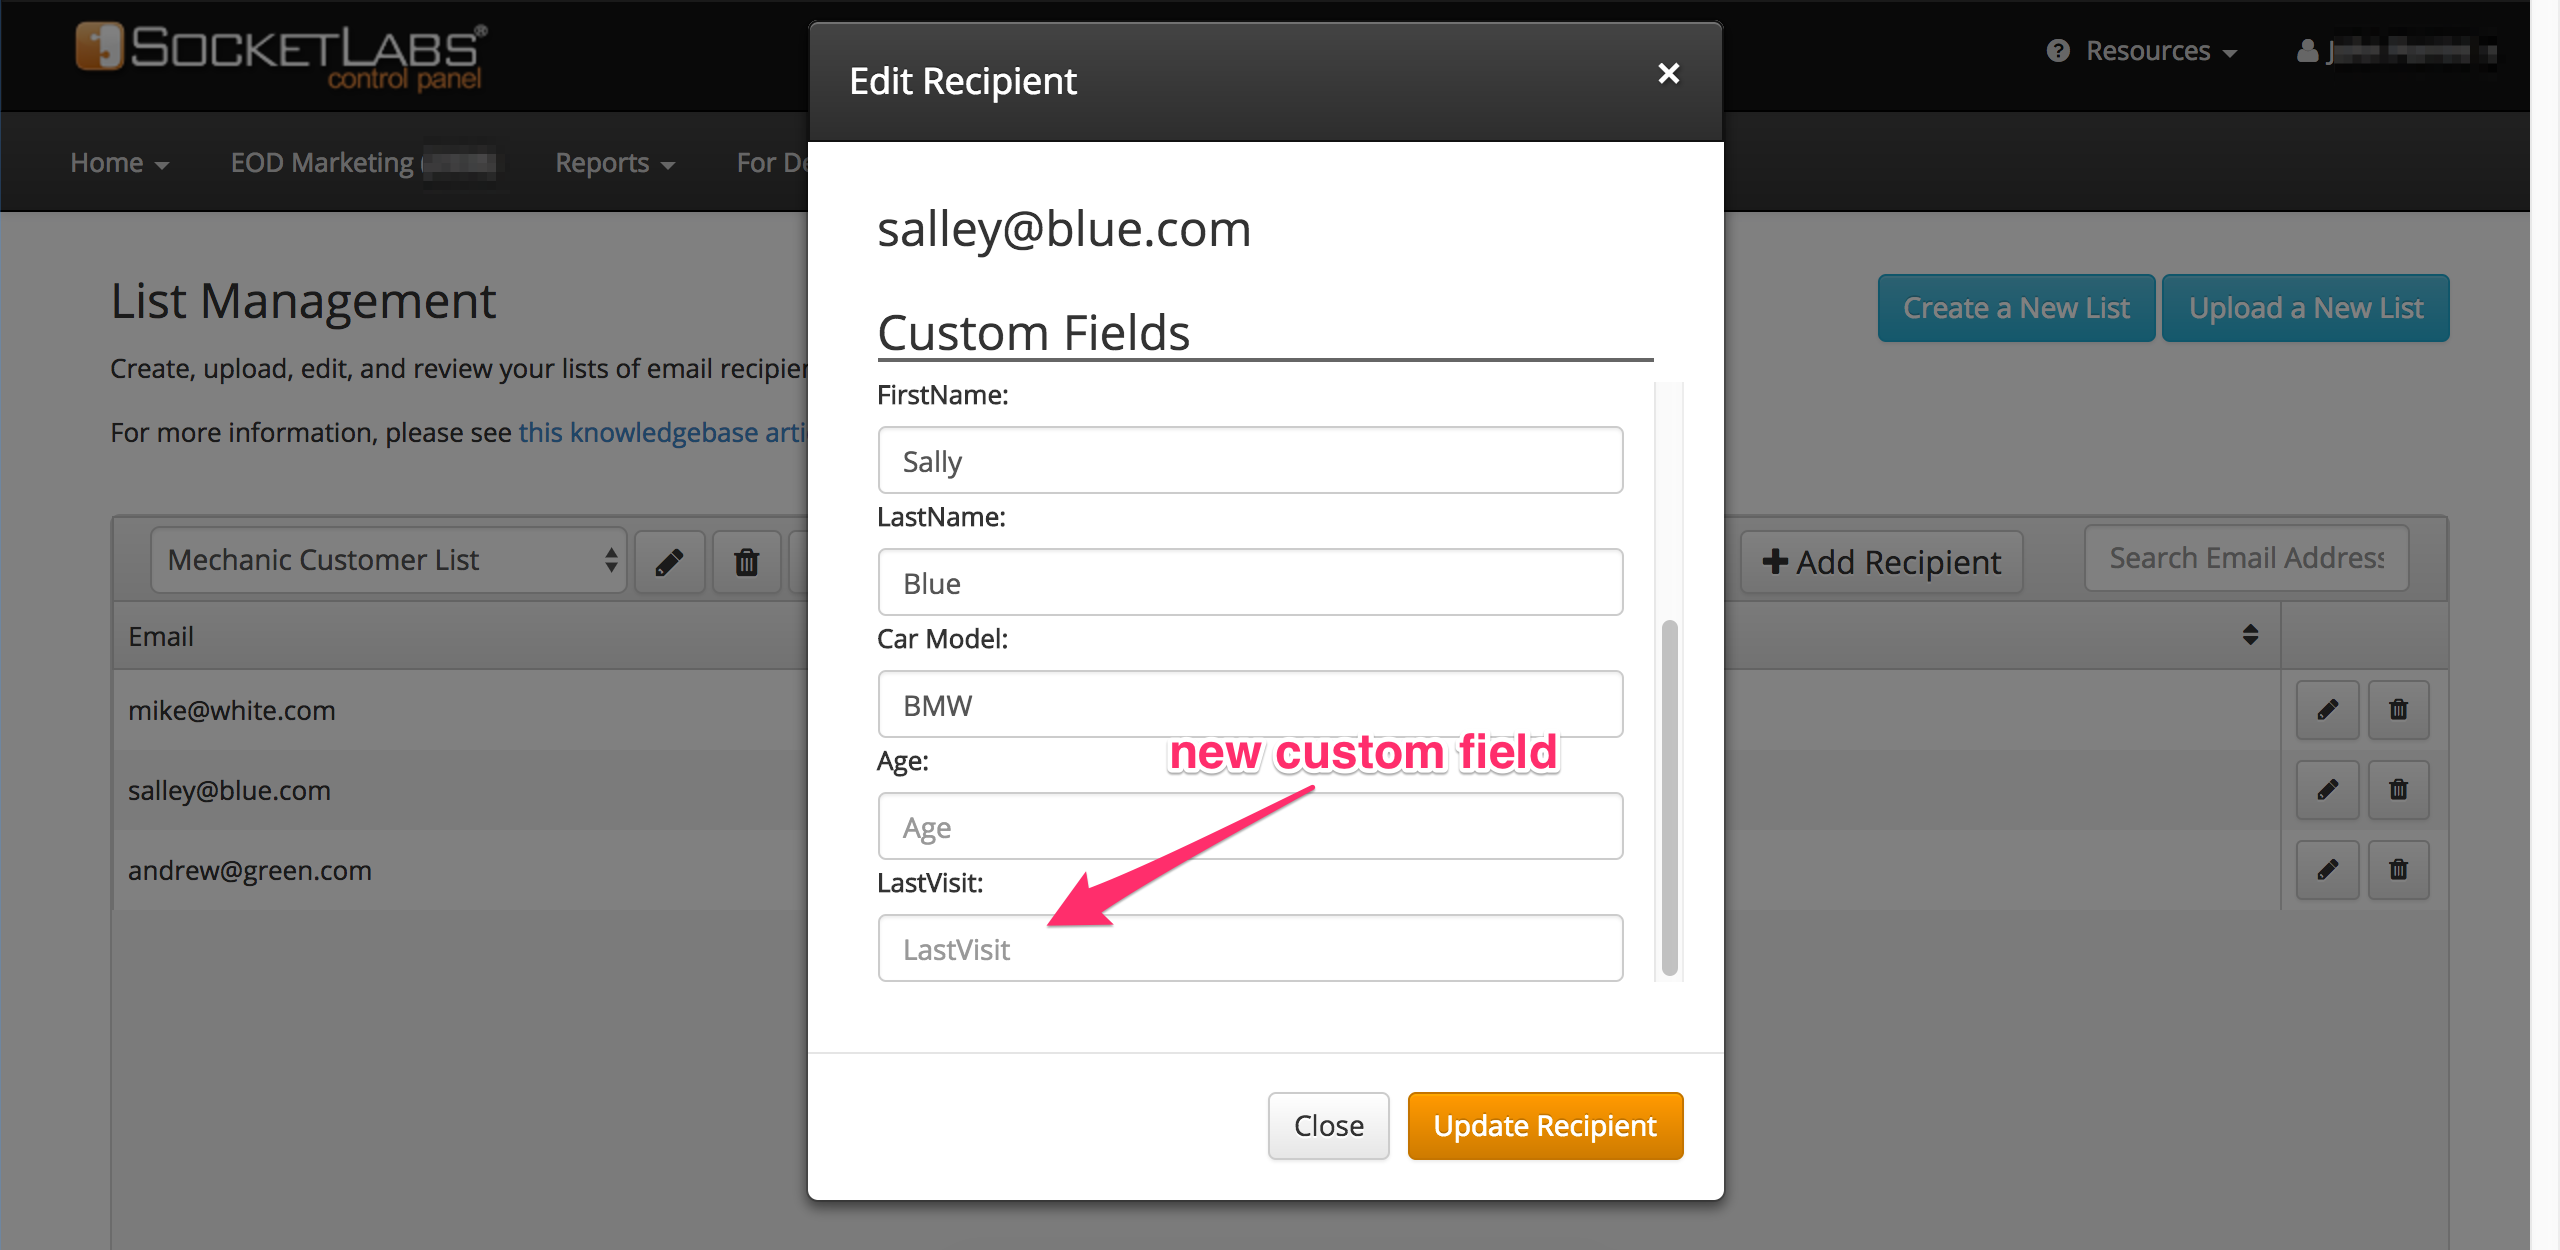
You just need to populate the custom field with data, like below:
Or, to make this process faster, you can just re-upload your list and map your columns to the new custom field that you created.
But, what about exporting the list?
With your new custom fields created, you may find yourself wanting to export your existing list for a number of reasons.
We also improved the list export feature to include custom fields in your spreadsheet

Based on the example that we covered throughout this post, you’ll see the Car Model and Last Visit custom fields, along with the data that’s associated with each contact record in the exported CSV file above.
Pretty cool, right?
That just about wraps things up for the custom field improvements. But, you still need to do something with all of this data. So, let’s go one step further and see how the car mechanic from our example, can use the custom fields to send a more personalized email.
Merging custom fields into your message for a more personalized email
Now that you setup your list and added custom fields to your account, it’s time to send out a personal email message to your customers asking them to stop by your shop for a tune up (remember, you are still a car mechanic).
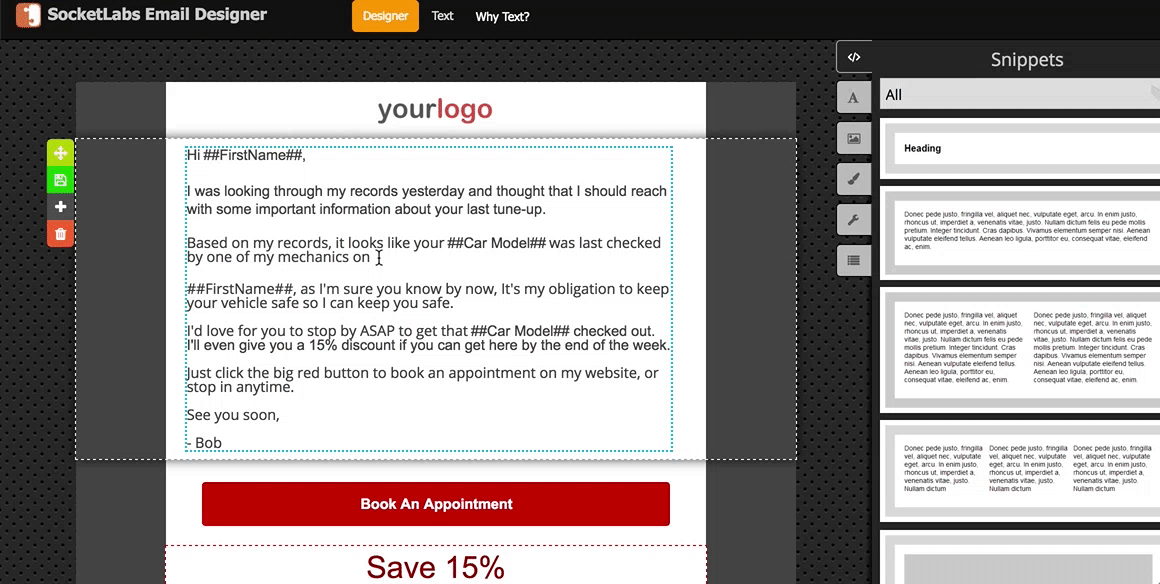
To create an email with custom fields, you’ll need to use the SocketLabs Email Designer. This feature makes it extremely easy to create beautiful emails from scratch.
Here’s an example email with the custom fields that we used throughout this post.
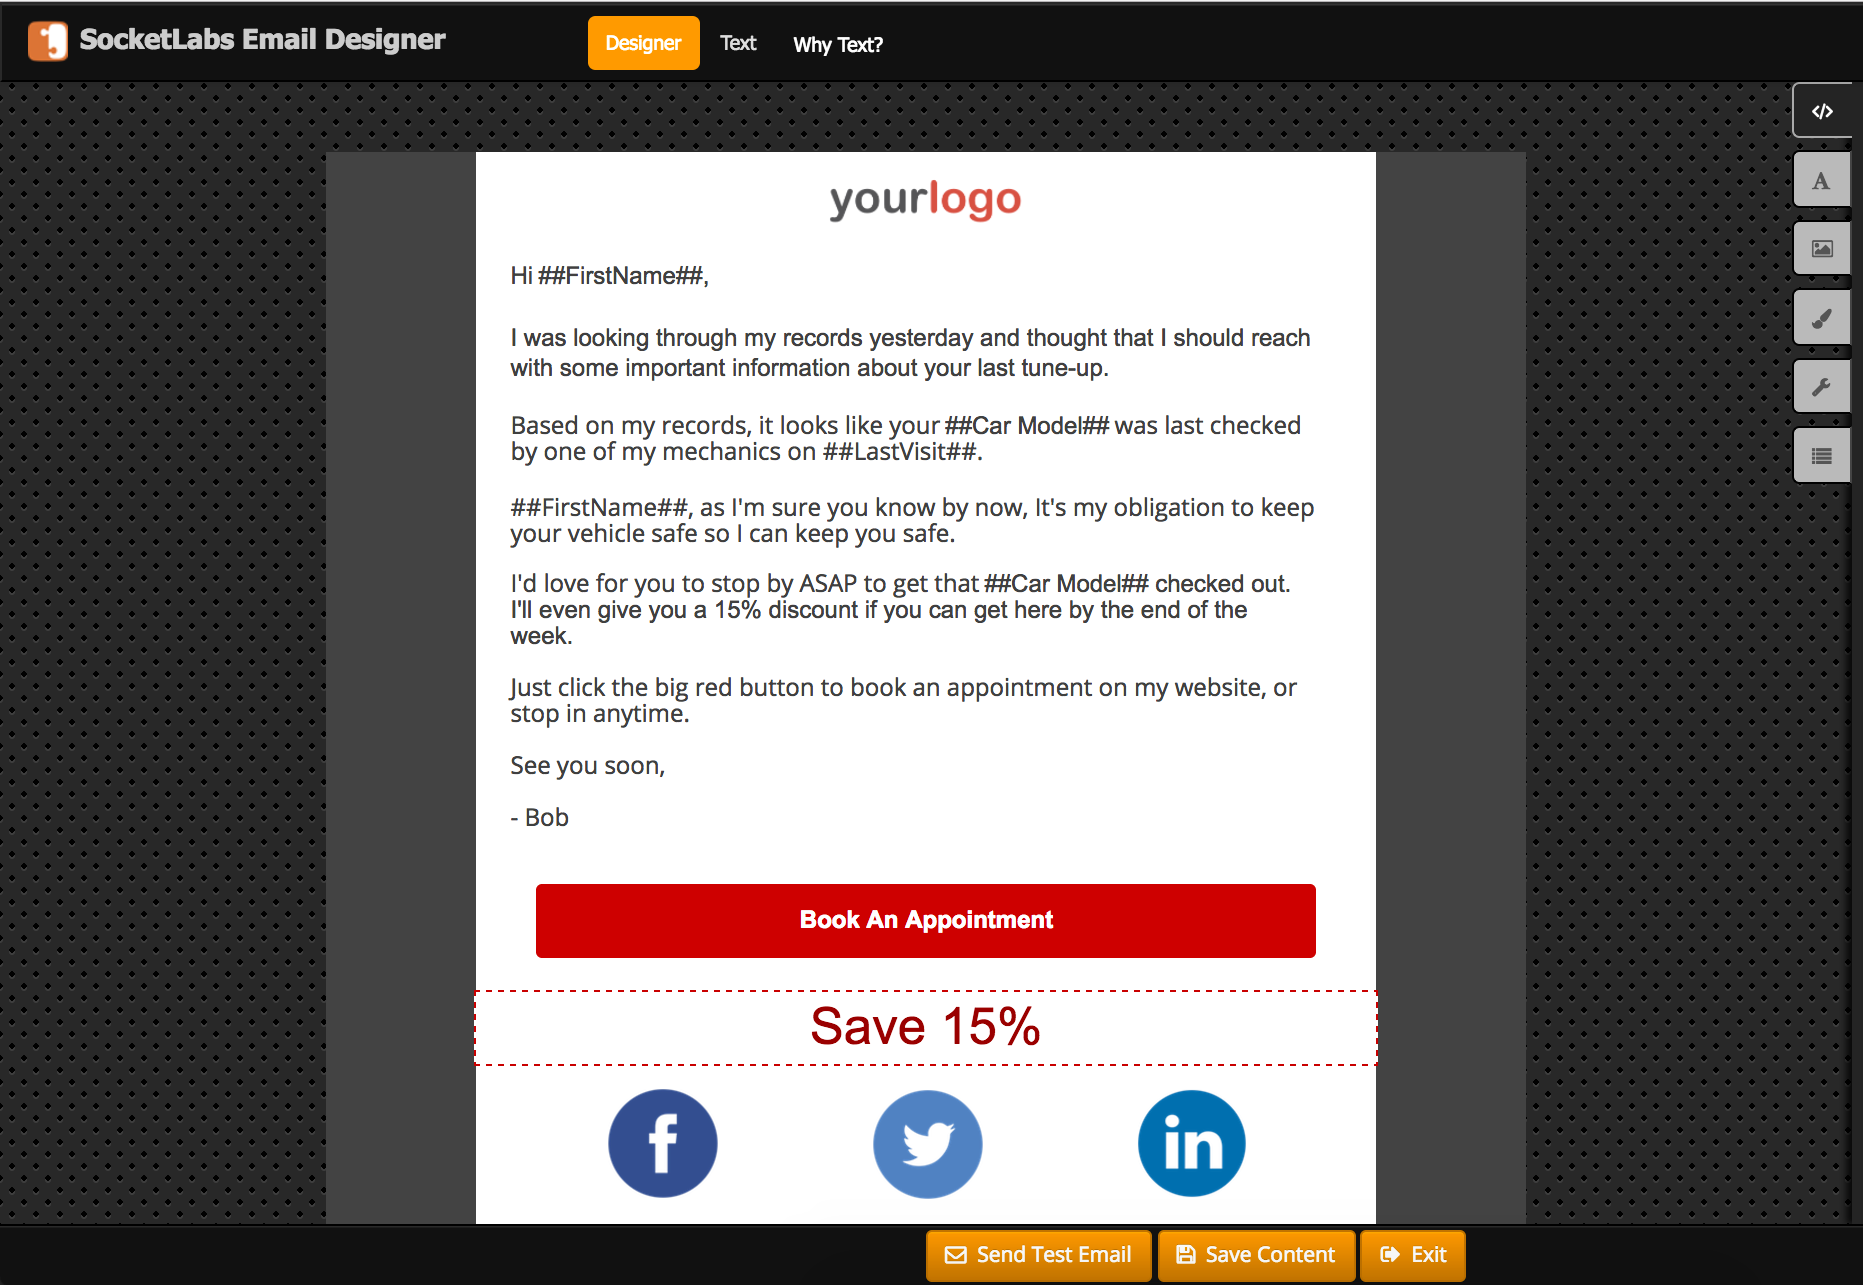
Notice that the custom fields are placed between two ## symbols. For example:
##CustomField Name##.
This is how you will format your custom fields on the SocketLabs platform.
So how do you add a custom field? It’s easy.
- Just click on the merge field icon at the bottom of the designer toolbar.
- Then, find the custom field that you want to include in your message.
- Finally, click on the name of the field. In this case, we’re adding LastVisit to the body of the message.
Now, let’s take a look at the body of the message and how the custom fields are fused into the copywriting.
Work custom fields into your copywriting for better results
It’s important to note that many email senders will often make the mistake of merging custom fields into their email without any thought about how to make the email look personal.
If you want to take full advantage of the power of custom fields, then you should think creatively about how to merge them into the body of your message.
For example, look at the body of the message below and notice how the custom fields are worked into the copywriting of the message.

In this email, you aren’t just randomly posting custom fields throughout the message. Each custom field is strategically placed within the email.
Take this line for example:

Two custom fields are worked into the copywriting of the message to add a flare of personalization.
The output of that very same line, looks like this:

That’s how you write a winning email message with custom fields on the SocketLabs platform.
Finally, let’s take a look at how the full message looks:

Obviously, your email could get even more personalized and dynamic if you’re working with more data or segmenting your list.
Just imagine all of the ways that you can use custom fields to deliver a more personalized email to your list.
We spent most of this post talking about how a car mechanic can send personalized emails using custom fields.
And, in addition to getting an introduction into some of the custom field improvements that we made on the SocketLabs platform, you also got a full tutorial about how you can start using custom fields to send more personalized email messages.
Now, it’s time to step out of the shoes of the mechanic that we used as an example throughout this post and think about how you can use custom fields to help achieve your specific goals.
What to do next – Get started with custom fields
If you’re currently a SocketLabs user, then you can login to your account right now to use custom fields.
If you are not a SocketLabs user, but you have an interest in using custom fields for marketing or transactional email, then click here to signup with a free account to try custom fields →