

 This tutorial will teach you how to write the Java code to send an email using the SocketLabs Java library. After completing this you will be ready to add email sending to any Java application.
**For this tutorial, we will assume that you have JDK, Maven, Gradle, and an IDE installed and setup. We will be using JetBrains IntelliJ as our IDE.
Importing the InjectionAPI from Maven Central:
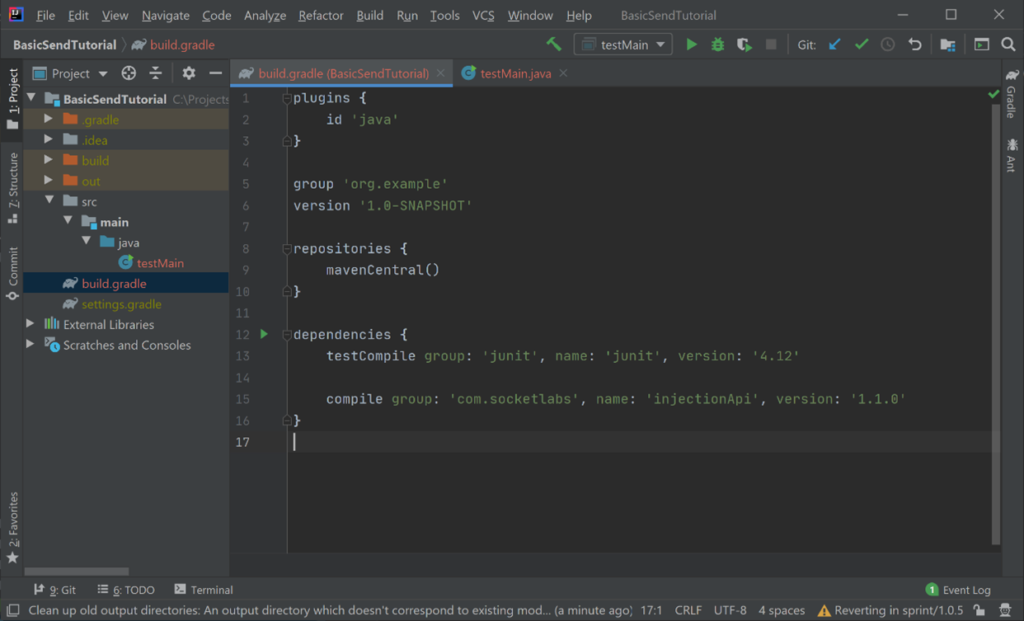
To begin, create a new Java project in IntelliJ using the default settings. In your newly created Java project, navigate to the build.gradle file.
Add the following code within the dependencies block:
compile group: ‘com.socketlabs’, name: ‘injectionApi’, version: ‘1.1.0'
As of the creation of this tutorial, the current version of the Java InjectionAPI is 1.1.0. You can check Maven for the latest version: https://search.maven.org/artifact/com.socketlabs/injectionApi
Your build.gradle file should look like this after completion:
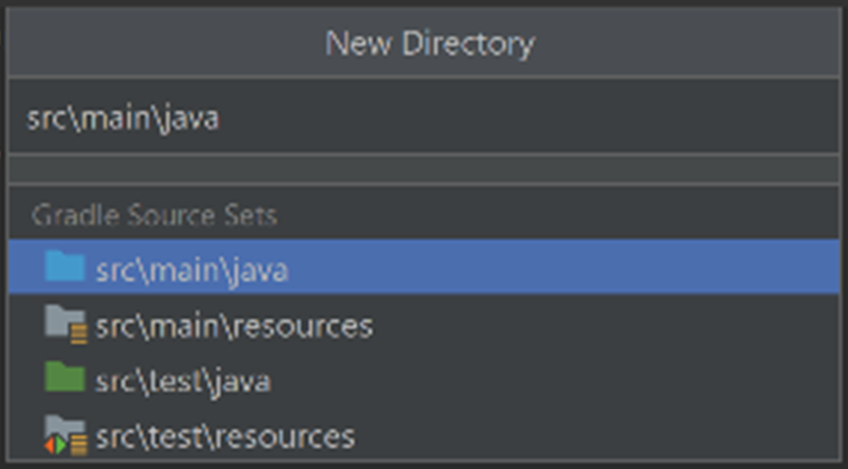
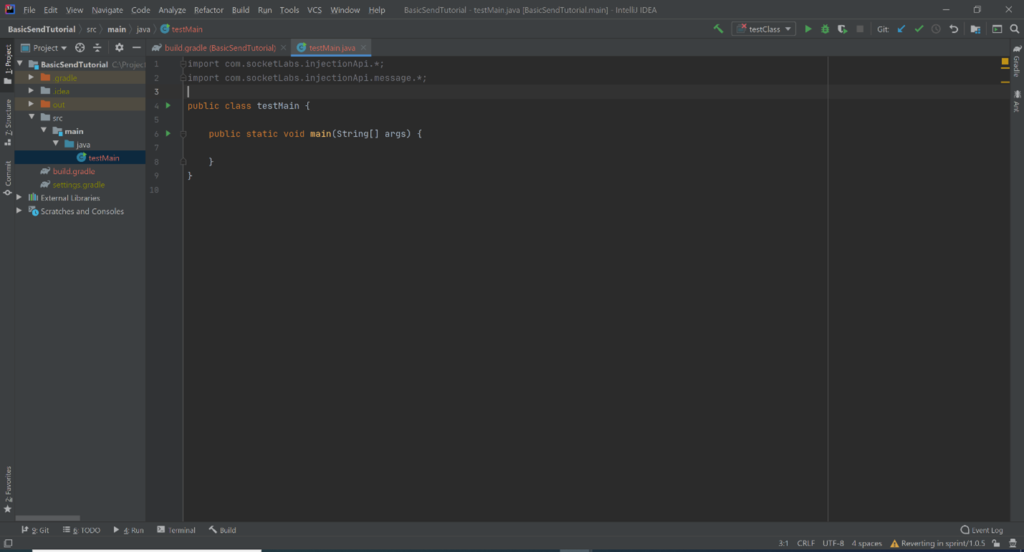
Next, create a directory at src\main\java in your project to hold the code file. If you are using IntelliJ, this directory may already exist.
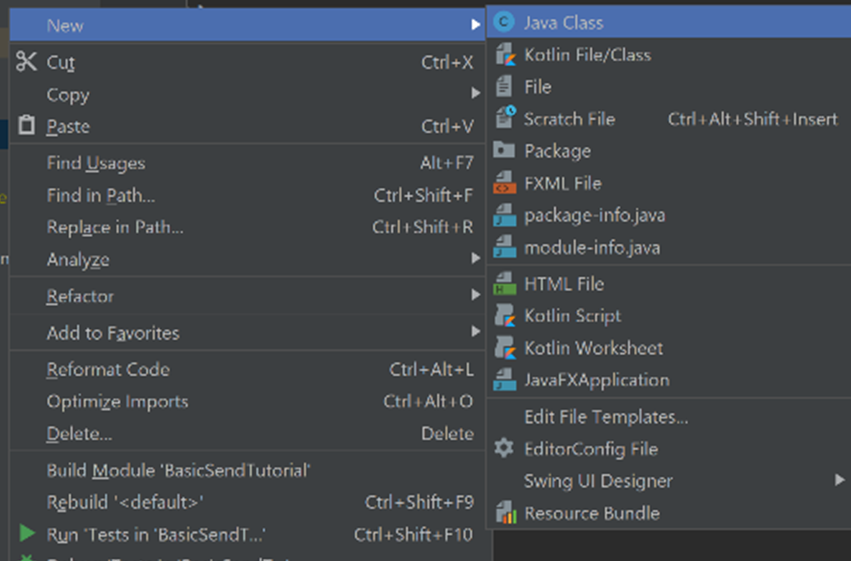
Now add a new Java class file to the directory you just created.
In your new Java file, above the class declaration, add the following lines to import the necessary packages:
import com.socketLabs.injectionApi.*;
import com.socketLabs.injectionApi.message.*;
Now the API is fully imported and we are ready to create and send our emails.
Building the email:
For this tutorial, we will be sending a very basic email to a single recipient, to see other available properties check out https://www.socketlabs.com/docs/inject/
Create the main method
Create a new BasicMessage object in the main method using the following declaration
BasicMessage basicMessage = new BasicMessage();
Add a subject to the message
basicMessage.setSubject(“This will appear as the subject of this email.”);
Add bodies to the message, you can add HTML body, plaintext body, or both
basicMessage.setPlainTextBody(“This text will be shown if the HTML text fails to display.”);
basicMessage.setHtmlBody(“This text has priority as long as HTML is enabled on the receiving end.”);
Add a recipient and “from” email address, make sure to swap in your emails of choice
basicMessage.setFrom(new EmailAddress(“[email protected]));
basicMessage.addToEmailAddress(“[email protected]”);
Building the SocketLabs Client and sending the email:
Now its time to configure the SocketLabs Client object.
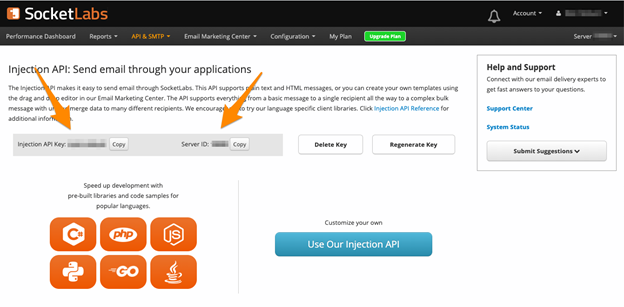
To begin, we need to obtain our ServerID and APIKey from the SocketLabs website.
If you already have a SocketLabs account, you can get your Injection API key here: https://cp.socketlabs.com/servers/X/config/injectionapi/
If you don’t already have an account, you can sign up here: https://www.socketlabs.com/signup/
After you have signed up, once you reach the Sending Options step of the Setup Guide, click the “Code Libraries” button under the API (HTTP Injection) option.
You can get your ServerID and ApiKey from here. This page may look slightly different depending on whether you have completed the Setup Guide yet.
Now that we have the required information, it’s time to get back to our code.
The next step is to build the SocketLabsClient object.
Use the following code, be sure to swap in your API credentials.
SocketLabsClient socketLabsClient = new SocketLabsClient(00000, “YourApiKey”);
Now we can attempt to send the email that we previously created.
SendResponse response = socketLabsClient.send(basicMessage);
The console print line is useful to see whether the send was successful or if there were errors.
System.out.println(response);
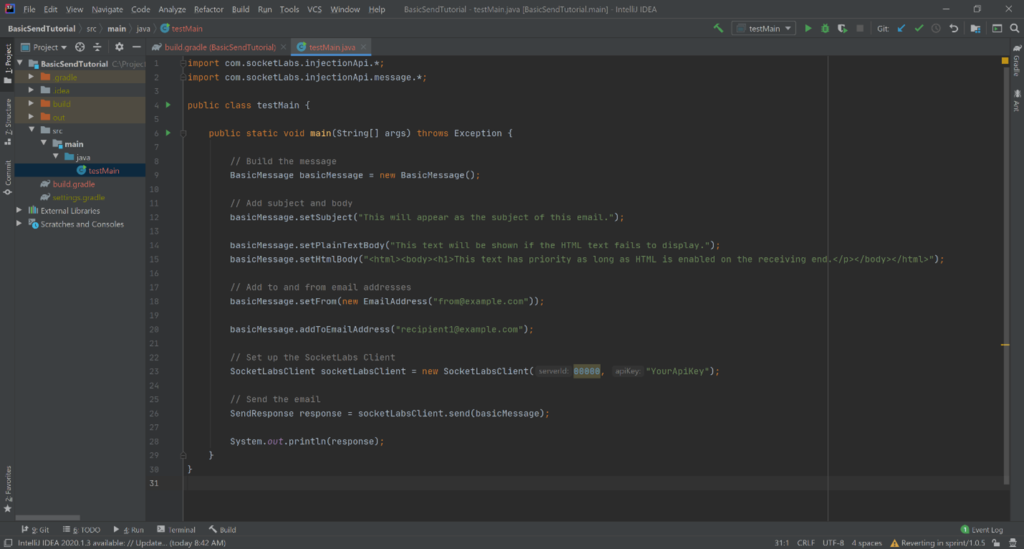
Here is what your final project should look like:
Pay attention to the output of your program and check your designated email to see if the send worked.
From here you can explore the rest of the features that the Java InjectionAPI Library has to offer!